Electrical Towing Harness Installation
Note from JD: Part 1 of this project is here, part 3 is here.
Back here I talked about the Blue Ox base plate installation on my 2010 Jeep Wrangler JK. As part of that project, I also needed to install a taillight wiring harness to connect to my motorhome. This little project was more work than expected!
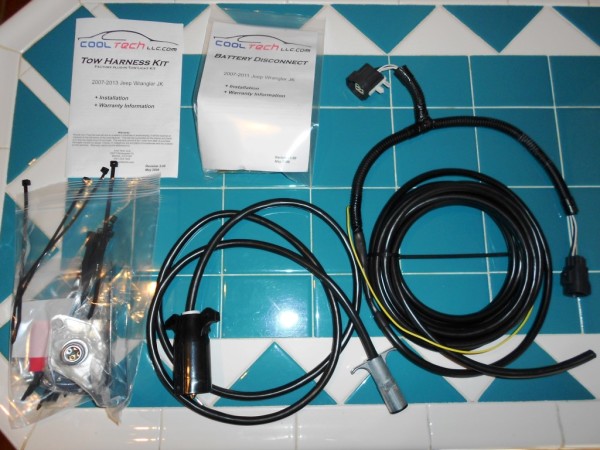
After reading many very good reviews, I elected to purchase the Cool Tech, LLC harness. It is a bit more expensive than some other options but it includes everything you need and works. Since the Wrangler also requires a battery disconnect for towing as well as the umbilical cord from the motorhome, I went with their Deluxe Kit.
The harness is very simple. It consists of four wires in a heavy plastic sheath and includes the necessary connectors at both ends. The connectors at the taillight end are installed and ready to go.
At the rear of the vehicle, one simply removes two screws to drop the left taillight away from the vehicle, unplugs the taillight connector and plugs the new harness into the vehicle harness and taillight. Then, the work starts…
Running the wire to the front of the vehicle is a challenge! One can run it exposed on the bottom of the vehicle (held in place with zip ties) or you can run it down thru the box frame rail. Guess which option I wanted? Yes, the harder but neater frame rail approach.
I attempted to push the wet noodle (wire) thru the frame from the rear. Believe it or not, I actually got it in about four feet before it would not move any further. Ok, plan B. I borrowed an electrical snake from a friend. A snake is a heavy gauge steel rod (with a rectangular cross section) that is used for fishing wires thru inaccessible areas. I “snaked” the snake into the box frame rail at the front of the vehicle and pushed in thru to the rear. Interestingly enough, there are a few things inside the frame rail that get in the way – it is not an open space. So, getting it all the way to the back required some effort. I think attached the wire to the snake and pulled it forward thru the frame. The first time, however; I hit something that would not allow the wire to go forward. I learned that the snake didn’t take quiet the right route around the “restrictions” in the frame rail. So, I had to detach the wire from the snake and then guide the snake around two of these restrictions. This is pretty tough to do as there are only a few finger size holes in the frame rail. It really takes two people – one moving the snake back and forth and the other guiding it. I had only myself so there a tremendous amount of back and forth – lots of good exercise!!
On the third or fourth try everything lined up and the wire pulled smoothly thru the frame. The next problem is that the front bumper mounts to the face of the frame rail. So, a big wire cannot exit there. Out came the drill and another hole was drilled into the inside of the frame rail at the very front to allow the wire to exit.
This wire is then attached to a waterproof connector that is mounted to the front of the vehicle. I mounted mine to the base plate.
Installing the battery disconnect is a simple matter. Removing the ground connection from the battery and add the disconnect switch in between the battery and cable. By turning the knob a few turns, the connection to the battery is broken. This is necessary as, when towing, the key must be in the “run” position to allow the steering wheel to move freely. If this is done without a battery disconnect, the battery will drain and you’ll arrive at your destination with a vehicle with a dead battery that will not start.
Go to part 3 of this project.


[…] from JD: Part 2 of this project is here, part 3 is here, and part 4 is […]