As part of our new “Homemade Money” plan – also known as the energy usage reduction plan, green plan, greenback plan, and ‘we wanna pay lower utility bills’ plan; it is time to get started on a solar collector to heat hot tub water. The goal of this is for us to spend less money by running the electric heater in our hot tub less often.
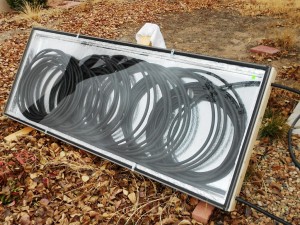
It just so happens that we purchased a couple of large glass panels a few years ago from a home material recycling store but there are plenty of options here. I would advise that you find your collector “cover” before starting construction on the solar collector. In our case, a whole variety of things got in the way and the glass panels sat in the garage… waiting… for today. These outside measurements of these panels are 29″ wide and 73″ long. That sets the size of our collector. This is not very big most of us tend to overdo things so its just as well that we are locked in.
We are using the black plastic tubing that is available in most home improvements stores and usually found near the lawn sprinkler hardware. We purchased a full spool a couple years ago to experiment with the idea of coiling it on the garage roof, pumping water from the hot tub thru the coiled tubing, and back into the hot tub. During the very few summer months that this was done, it worked very well. Output water temperature was measured as high as 135 degrees and had the hot tub so hot (several times) that it was kind of painful to get in! There was no automation to this experiment though so a lot of babysitting was required which eventually became the demise of the project.
This time around, our plan is to put this tubing in a collector to make it more efficient and, hopefully, work better during the winter months when the outside temps are low. Additionally, an electronic controller is needed to automatically run the system. This will involve a temperature sensors to note when the water in the collector was hotter than the water in the hot tub and a controller to turn on the pump until the water in the collector had cooled.
First things first, the collector.
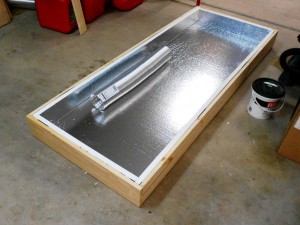
The collector can be constructed using 1″ x 4″ lumber and 1″ Styrofoam board/panel so that it fits the glass panel. There are a multitude of ways to do this but one of the easier options is to use several of the 90 degree angle brackets in the four corners to secure the four sides together. Just about any backing board is acceptable but I’d suggest something light but secure. The foam is cut so that it fits snugly inside the collector. You can glue it in place if you like but that does not seem to be a requirement. You can purchase aluminum tape sized about like a roll of duct tape at your local hardware store with which to tape all the seams in the foam. At this point, you can decide to paint the interior of the collector flat black or leave as-is – I have left mine shiny (it may get painted black in the future). The following photo was in the middle of this process and is not complete. Also ignore the aluminum duct/tubing – that is for my solar air heater, more to come on that later.
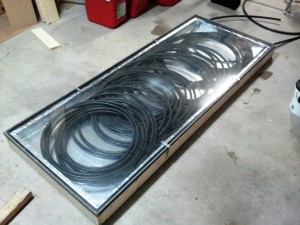
You then coil as much of the black tubing into the collector as possible being careful not to kink it. Using a wood drill bit, drill a couple of holes in one of the short ends of the collector for the tubing to enter/exit. Finally, attached the glass panel. This attachment probably varies considerably from one project to another. One option is to use more of the 90 degree angle brackets to hold it in place. This is not a great option but it is quick and simple. In my case, the glass panel is not well sealed, yet. If you are sure your collector is done, go ahead and seal it up. If experimenting like I am, it will probably be coming apart in the near future for tuning and playing with things.
Testing your solar collector/solar hot tub heater can be a ton of fun and very rewarding!
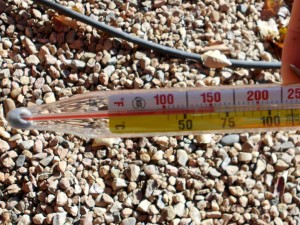
Having adequate instrument would be great but most of us probably don’t. A few thermometers, like the meat and candy thermometers shown in these photos, will get the job done and allow you to see how well your creation is working.
The first day of our testing was sorta cold, cloudy, and windy. We watched the internal temperature of the collector rise to 120 degrees but it was just too cold to be outside so testing was canceled.
The next day was a chilly day (around 35 degrees) but bright and sunny. Other tasks kept us busy until early afternoon. When a bit of water was pumped thru, the collector output was 150 degrees! Nice!
The third day was a little less chilly showing 45 degrees at 2:30 pm when I checked things out. Once again, solar energy worked and the water came out piping hot. This time I measured 175 degrees!! Wowsers! That is amazing. No photo though… sorry.
The point worth noting is that up to this point, I have just been leaving the water to be heated by the sun for hours at a time. Things will change significantly when I begin more frequent pumping of the water. To do that, I need to get a pump and, eventually, a controller to operate the pump based on temperature. A pump such as this one might do the trick and then some sort of temperature controller.
It would be really neat to have a photovoltaic panel to generate solar electricity to power the water pump. However; small steps – all this stuff costs money!! Note: See the links below for more info on this.
Note from JD: I’ve added part two of this project here.
Another note from JD: I’ve done a lot of work with solar electricity over the last few years. Here are a few posts that you might find interesting.
- 1720 Watt Solar System on Missy – my current home.
- Solar power on a cloudy day.
- Solar power system installed on my Newmar Dutch Star.
- Solar power success
- Solar power system installed on my Pace Arrow.


JD Great description
I”m here in PA and thinking about doing something along these lines to heat my pool for less, specifically since I run my pump at different speeds all the time. My question is: How long were you able to sustain an output of water temp greater than say 100 degrees F, running water through the box with the coils of black pipe?
Thanks
NEAL
Hi Neal, I’m afraid it has been long enough that I cannot recall the details. It seems like it was pretty easy to maintain a fairly high temperature (100-110 degrees) with direct sun and the flow of water being fairly slow. I wanted to install some temp sensors that would kick the pump on and off to kind of maximize the output but I never got that far.
what clear item did you use to cover the whole casing? A large single sheet of clear plexiglass?
Hi Brian – I found a large glass window with aluminum frame in a recycling store and used that. I made the box to fit.
I wonder if you could maximize the effect by replacing reflecting foil by some black-painted aluminium surface to absord maximum sunlight and warm-up inside-the-box even more. In your variant sunlight that is not absorbed by the pipe is reflected by you background back to the atmosphere
Hi Max – take a look at part two of the project.