Most RV’s and motorhomes have self-contained air conditioning units mounted on the roof.
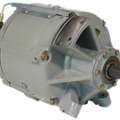
Missy has a BIG air conditioning system that is powered by the engine (alternator and compressor) but that does me no good while parked. The other negative about her existing system is that it consumes a huge amount of space in the basement. On a positive though, this system has massive cooling capability. It uses duct work that runs under the floor. However; some of this was closed off when I deconstructed her.
I’ve spent more than a year trying to decide on the best cooling “system” for my particular situation/equipment that can be used when driving as well as parked/camping. It seems the “perfect” solution may be out of reach. Nonetheless, I decided that a fairly typical motorhome style system is the way to go.
To accomplish this, much has to change.
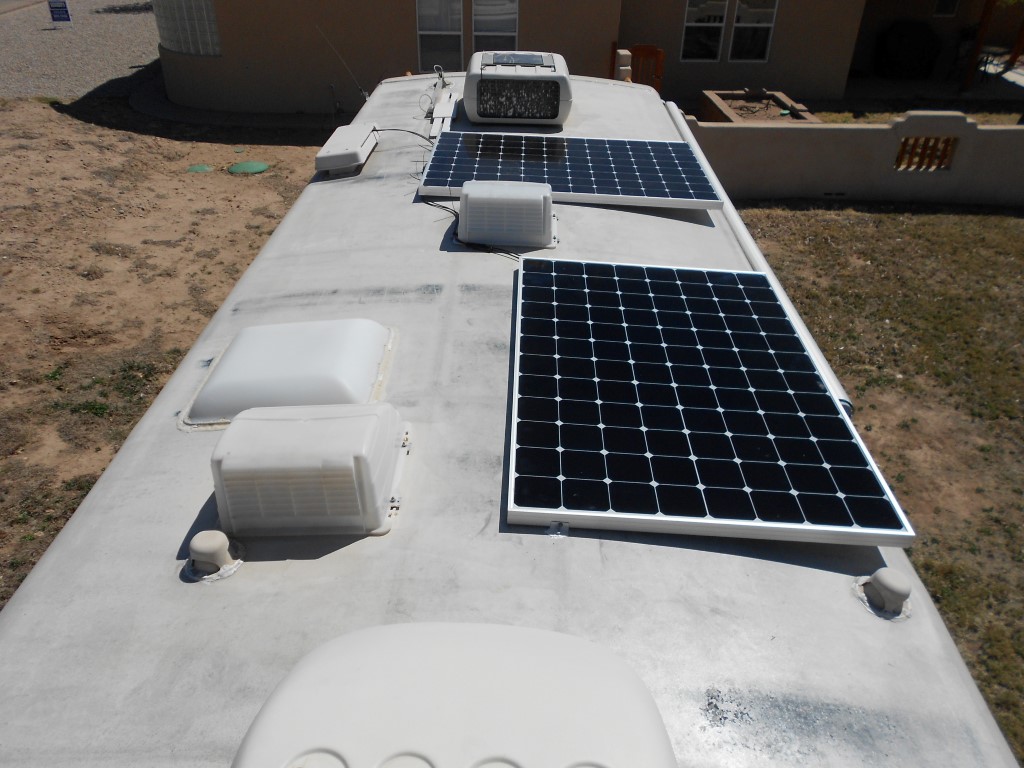
First, the two emergency hatches in the roof/ceiling needed to go away – sort of. The plan was to build a metal framework that would fit inside the open space. This framework provides two 14″x14″ square holes for an air conditioner and also a Fan-Tastic Vent. This allowed using existing holes in the roof.
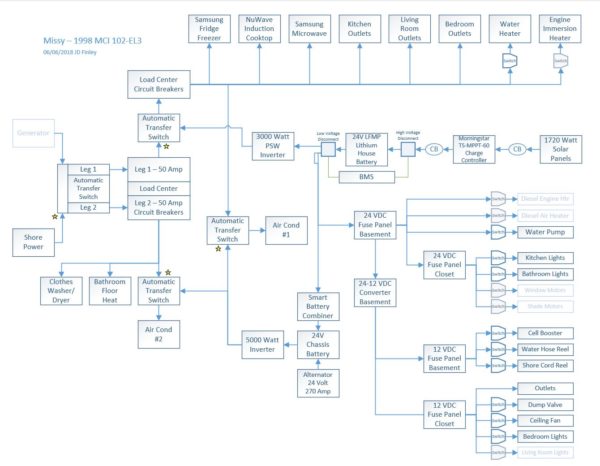
Power is required for both the air conditioning and Fan-Tastic vent/fan. So, 120VAC power and 12VDC power was wired to each location.
One of the big design questions was ducting the refrigerated air. I’ve owned a motorhome that did not have ducted air conditioning and one that did. The non-ducted style was far too loud to be comfortable – I want ducted air. When I built the ceiling, I included two air spaces to use for cold air and air return. I admit, the space is small but I am hoping it is enough to support the necessary flow of air.
The operation of this system when parked with shore power is easy. The complexity begins when running them while driving. Typically in a motorhome, one starts the generator which then powers the air conditioning units. I do not have a generator. One option is to ‘simply’ add a generator.
It seems that I’m not into simple these days.
Of course, there is nothing simple – or inexpensive – about adding a diesel generator. That said, removing the bus air conditioning system would open up one whole bay in the basement (plus about half a bay on the passenger side) which would be an excellent location for a generator!
The option I have decided to pursue when driving is to power the A/C units thru an inverter using the engine alternator output. Missy has a BIG 24 volt – 270 amp alternator and two big 8D batteries for a 24 volt chassis battery bank. This means the alternator can produce, on paper, about 7500 watts (28VDC charging voltage, 270 amps). Of course, I don’t know that it will do that in real world operation. Each 15,000 BTU A/C unit draws something around 12 amps at 120VAC – about 1450 watts. They also require a good bit more power at startup. In theory, it is possible to power both A/C units from a 5000 watt inverter. I just happened to have a spare one of these. If startup surge power becomes an issue, there are some neat “soft start” add-on’s available that I believe will solve that problem. On paper, this looks like the following diagram.
Regardless of all that “power” talk, getting the roof mounted air conditioner units still had to happen.
I decided on the Coleman Mach 8 low profile, 15,000 BTU heat pumps.
These units include a condensate pump that takes the condensation that forms from the cooling action and pumps it down a hose. Often, RV manufacturers just let this moisture down onto the roof and down the side of the RV. I hated that approach! Mine will drain onto the ground under the coach.
The vent I chose was the Fan-Tastic Vent 7350 Series Vent. It is remote controlled and has lots of options such as operating based on temperature or manually selecting the speed. It also includes a rain sensor which causes it to close automatically. A couple Ultra Breeze vent covers were also ordered.
Lot of measuring was required to ensure that I could accomplish the goal. It seemed it would work so, with fingers crossed, two of the A/C – Heat Pump units were ordered.
The two of them arrived in pretty short order and it was time to get busy.
Some careful fitting was done to create the steel framework. My friend John welded this up for me and did an amazing job – beautiful work!!
Starting at the front emergency hatch; the hatch and sealing flange was removed. The steel frame installed using 1/4″ steel rivets.
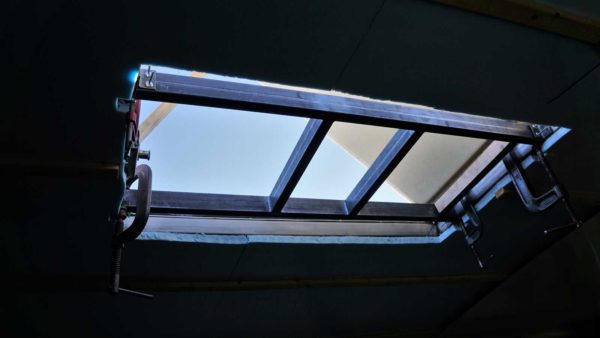
Sheet metal was then riveted in place – with lots of Dicor sealant to close out the old hole in the roof.

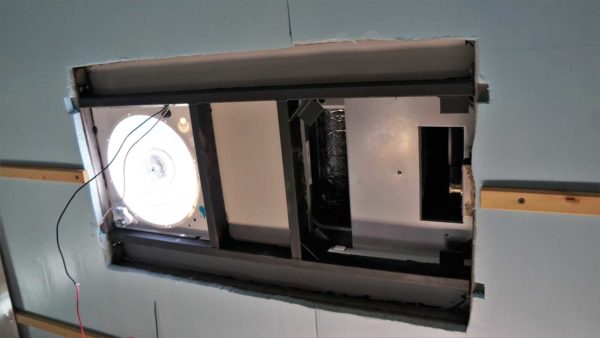
No silly… the cardboard is not permanent – only there to block some of the light so I could get a photo.
The Fan-Tastic vent was installed in the forward most hole. The air conditioner/heat pump located over the aft hole.
EVERYTHING FIT!!! YAY!
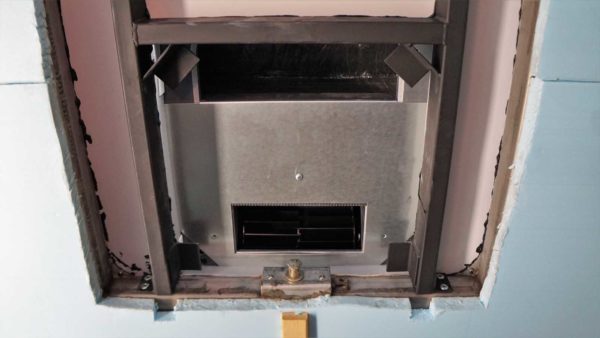
The air conditioner/heat pump is now bolted down but not yet powered. I need to repeat the process on the aft emergency hatch. Then I’ll get busy wiring, installing the thermostats, and installing insulation.
Part two to follow in a few days.

My My. You are one motivated energetic can-do guy. Wish I had 1/4 of your ‘get er done’ motivation.
Ha! Thanks Tom! I wish I felt energetic!! 🙂 I seem to have too many irons in the fire this summer. Time to simplify, again. 🙂
Wish you would have called me to formulate your power problem…no problem!! HAHA
Jon…
That wiring diagram ‘alone’ blows my mind! It seems like a good idea saving your ideas, trial-and-error, progress that could turn into a ‘How To’ manual for others desiring such a conversion.
Ha! Just one wire at a time… 😉
Yep, you are doing what I did 22 years ago to my Eagle. You won’t miss that bus air for a minute.
Good to hear John! Thanks! I haven’t started the removal yet – kinda nervous about it. I figure one of these days I’ll build up enough courage to remove a bolt and magically, a few hours later, a whole slew of parts will be laying on the ground all around the coach! 🙂
Nice job Jon, as usual!
Needs more cat pictures to make article interesting. Just a suggestion.
Love you!!! 🤪
Ha! You are right – I forgot the cat pics… again… 🙂