The age of the house batteries in my RV/home (JBAM) was unknown. They were in the coach when I purchased it and there was no indication of when they went into service. They have served me very well for about a year and a half. However; they have some swelling and use a lot of water. I have theories about the issue (both are symptoms of overcharging) but haven’t spent any time trying to sort it out – just not a big enough problem. Winter is the period in which I use and rely on my house battery bank the most. The furnace fan consumes a good deal of power when heat is required, the nights are longer so lights and TV is used more, and there is less sunshine for the solar charging system – just some of the reasons for winter being “hard” on batteries.
I decided a preventative replacement was in order. I’d much rather replace the batteries under desirable circumstances before they are end-of-life than be sitting in the middle of nowhere and REQUIRED to replace them. I guess I don’t like having to do things RIGHT NOW!
So, some research first.
As a frugalmeister, the Sams Club GC2 6 volt golf cart batteries are very attractive at about $85.00. However; they are a 208 Ah (at 20 hour rate) battery.
Batteries Plus was offering a GC2 6 volt battery of 230 Ah capacity for $110.00. An additional 22 Ah for $25?? Almost! They are also offering 10% off on all online sales. So, $100 per battery. I decided that 460 Ah for $400 was a better deal than 416 Ah for $340. So, I bought a set of four from Batteries Plus. With 10% off pricing, total cost for four batteries was $424.91 (which included $28.95 tax). They even wheeled out to my Jeep and loaded them for me!! Thank you guys!
The specs on the battery are as follows:
- 230AH at 20 hour rate
- Item Number: SLIGC115
- Brand: Duracell Ultra
- Voltage: 6
- Format: BCI Group GC2
- Lead Acid Type: Deep Cycle
- Battery Type: Basic
- Capacity 20hr: 230AH
- Chemistry: Lead Acid
- Lead Acid Design: Flooded
- Made in the USA: True
- Maintenance Free: No
- Terminal Type: DT, SAE/M8 Stud, SAE/M8 Threaded Post, WNT
- Warranty: 12 Month Free Replacement
- Weight: 64 lbs
- Length: 10.25 in
- Width: 7.125 in
- Height: 10.875 in
That was the easy part!! Being a bit of a clean freak – installing the new batteries would be a much bigger project than simply swapping them. Cleaning and painting the steel tray, replacing old cables, and generally improving the batteries new home was a must. Some folks don’t care for this type of maintenance but I really enjoy it and find it very rewarding.
Oh, one other change. I purchased a battery temperature sensor for the MorningStar TS-MPPT-45 solar charge controller and I needed to route this cable.
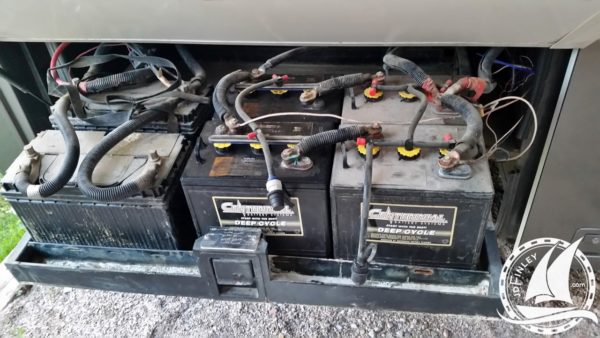
I picked a nice early Saturday morning to get started on the battery swap. My advice is to start by taking several photos of the batteries and cables so you have something to refer to when you can’t remember which cable went were!! 🙂 Shutting down all things electrical and disconnecting the batteries is first. Then I removed all the cables, watering system, and old batteries.
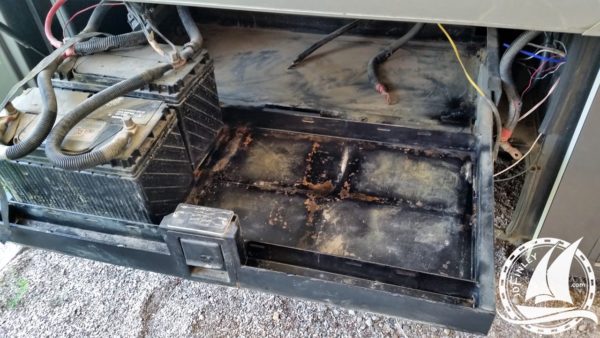
As you can see, my battery try was not in terrible shape but it was dirty and had some surface rust that I wanted to clean up. Notice that I decided not to mess with the engine batteries. They are working fine but yes, they are dirty!
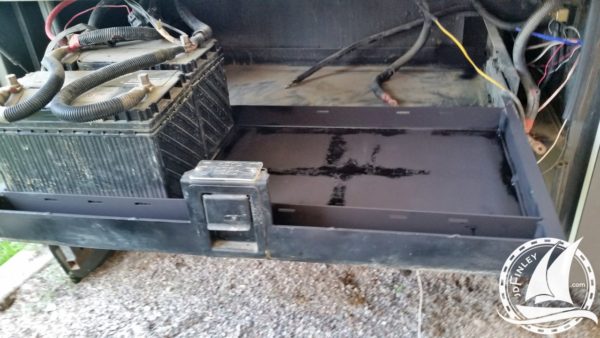
After a very thorough wire brushing and cleaning, I used Loctite Extend Rust Neutralizer spray on all the rust spots. After this dried, I applied some high temperature black paint to the entire tray. Finally, a coat of semi-gloss black paint on the visible portions of the tray. It was looking GOOD!!
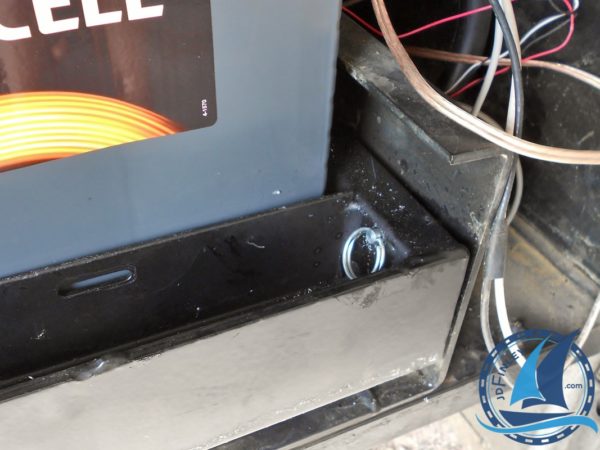
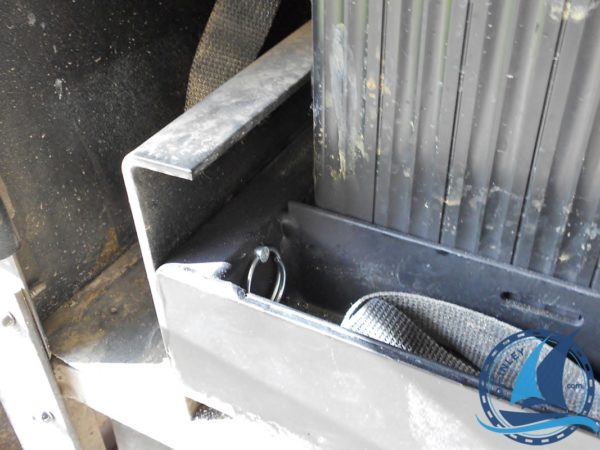
I found that the sliding tray latch was broken which is a pretty common problem. I had been meaning to install lock pins but just never got around to it. Now was a great time to do that little project!
Space is at a premium so fitting a drill into the mix is pretty tough. I started with the goal of installing two lock pins – one on the front on each side of the tray. I made things too difficult on the first side and I won’t even bother with the details. On the other side, I just drilled the hole from the front at a slight angle which allowed the drill to fit. With the pins in place, the tray is very secure.
While working on the tray, a light cleaning and lube of the tray rollers was in order. They were slightly gummed up and not rolling super smoothly. Now they glide like they are on ice!
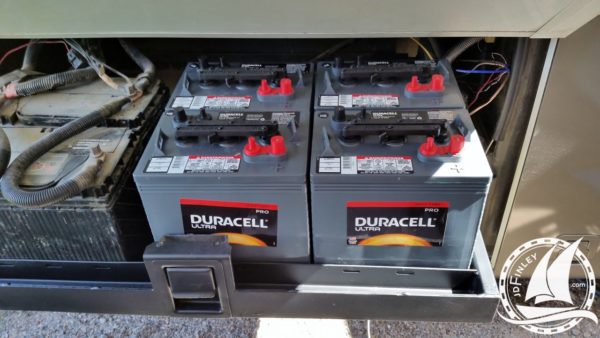
The tear down and cleanup doesn’t take too awful long but waiting for the paint to dry does. So, it was early afternoon when I finally started installing the new batteries and they slipped right into place.
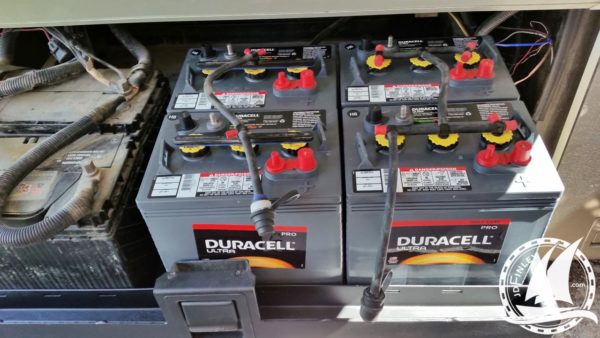
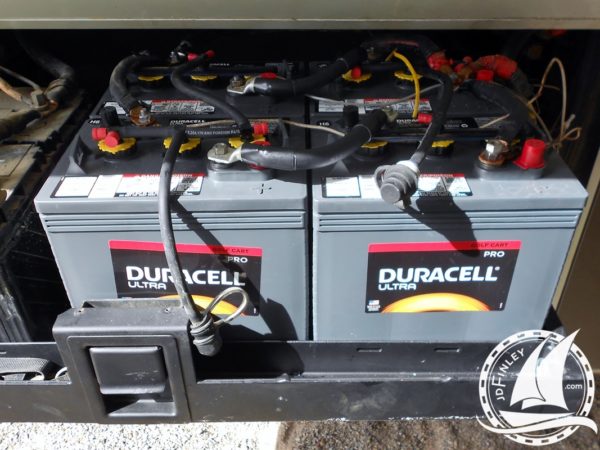
I learned when installing the battery watering system (mixed with the Pro-Fill hand pump makes watering very easy) that doing so BEFORE the battery cables are installed is advantageous. Thus; I started there. Next were the cables. The short 4/0 jumper cables were just a wee bit too short for the new batteries. I had to use a temporary set eighteen inch long, 4 gauge cables. I ordered a set of 12″ 4/0 cables from Amazon to serve as the permanent solution. You just have to love Amazon!
While everything was apart, I checked the connectors on all cables and found a couple of that were not very tight. These were re-crimped.
Finally, it was time for a smoke test!
I was happy to find no smoke and everything working as it should be making for a project that I am proud of and will work for me for many months to come!


Great jog and good photo documentation for those that might want to do the same preventive maintenance. Those locking pins are a great idea and one that I would not have thought of. I take it through this project you had no problems with your “new” arm??