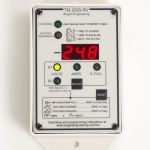
While researching solar power on the Internet, one cannot miss the many references to the Trimetric Battery Monitor. Many, many people love this monitor. So, I followed their lead and purchased one too. I got the RV-2030 model.
Why?? Well, that is the question I had prior to spending ten days boondocking with solar only. As a result of that experiment, I began to understand how nice/convenient it would be to know what is happening with your battery bank. Required? No, it is not. However; one does run the risk of damaging the batteries (over-depleting) and is constantly wondering what state things are in. I decided that knowing exactly what was going on with my 12 volt electrical system would be very beneficial, provide a great deal of peace of mind, and would be well worth the two-hundred dollars that the Trimetric battery monitor costs.
Installing the Trimetric Battery Monitor is pretty simple but that doesn’t mean that some effort is not required. In my case, I needed to install a 500 amp shunt at the battery bank and then run the cables.
The shunt is pretty easy. You simply need a place to mount the shunt and the correct cables to connect it to the battery. For this, I had to make one very short length of cable.
The cable from the shunt to the Trimetric monitor is a not so easy – at least in my case. I wanted to follow the existing electrical wiring and not punch a new hole anywhere. This required a run from the battery bank in the very front of Shaneeda, to the rear axle, up thru the floor, and then forward to my “electric panel” location. I ordered a 50′ cable and just barely had enough.
Of course, while I was at it… I also ran a battery voltage sense cable and battery temperature cable to the MorningStar MPPT solar charge controller. These two add-on’s would allow the charge controller to do a better job by having an accurate sense of the battery voltage and temperature.
The Trimetric monitor has a bunch of features. Initially, it is setup to provide just the basics and only requires setting three values. The monitor is very capable is this mode only. Configuring the monitor requires a read or two of manual as everything is done with just two buttons. It is certainly not difficult – just read the manual.
I have thoroughly enjoyed playing with this new tool. It is fun to run various electrical components after dark and be able to see the amperage being drawn and the battery ‘percent full’ change. I’ve drawn the house batteries down to the 80% level overnight. Believe it or not, this takes a great deal of effort. I am entirely LED equipped so leaving all lights on doesn’t draw much power, so, I have to use things like fans, incandescent lights, and a small inverter. Watching the voltage climb and the battery ‘percent full’ value climb as the sun rises is very neat! The battery bank is full by 09:30 AM and I can burn as much electricity as I like. That is a great feeling.


[…] Note from JD: Some interesting related posts are my solar install and Trimetric battery monitor install. […]