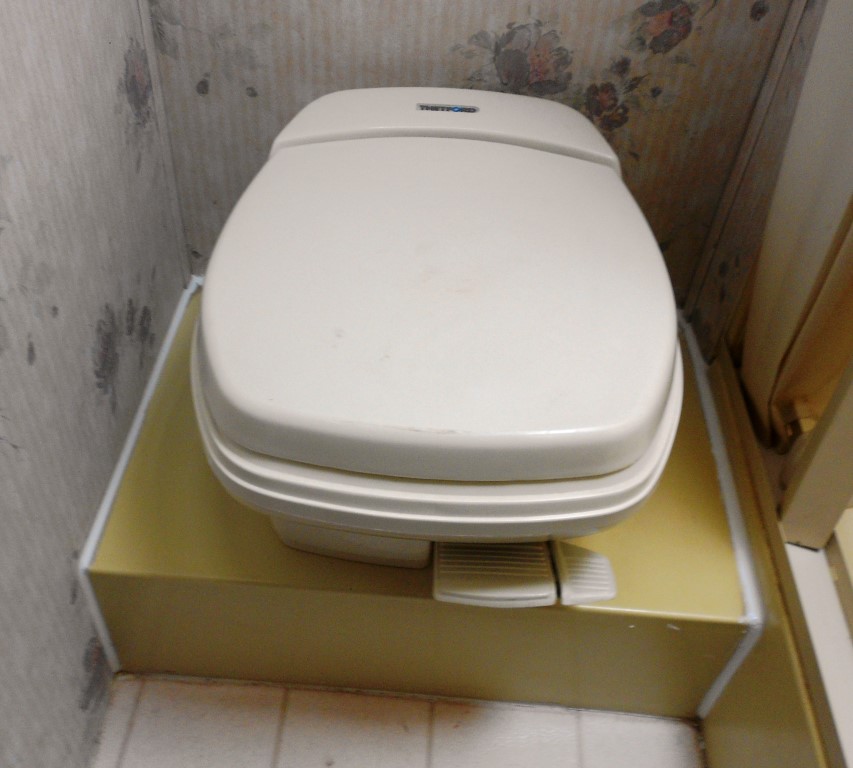
Shaneeda has one mega-fancy Thetford toilet on board. I know because of the name – “Aqua-Magic Galaxy/Starlight.” Pretty fancy name for a toilet, eh? 🙂
Given my expectations of a toilet, it has worked ok. However; it did not hold water in the bowl for very long as they are supposed to do. Instead, it slowly leaked down into the holding tank over a period of a couple minutes. The purpose of the water in the bowl is to create a barrier to prevent holding tank odor from getting into the motorhome. I don’t believe my crap stinks, certainly not my motorhome, but thought I should address this in case it suddenly starts. A toilet overhaul was in order!
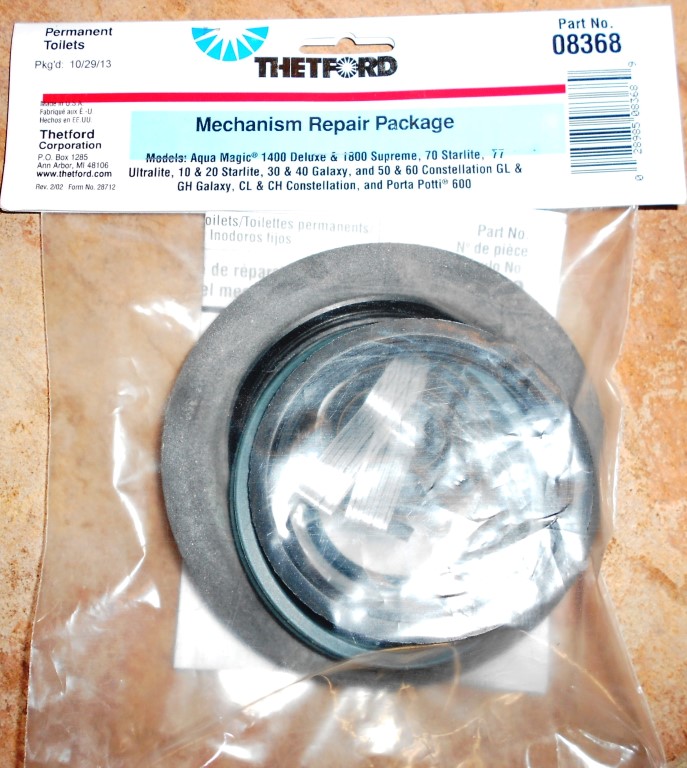
Rebuild kits are available for this toilet model so I ordered one from Amazon. It cost about $30 and showed up in a about week. It includes every rubber seal and o-ring in the toilet – even some new screws.
The toilet overhaul began with a good scrubbing – inside and out. I didn’t expect the rebuild to be “clean” work but at least starting from a reasonable point would help.
Removal is simple. There are only two nuts and one water connection holding the toilet in place. It was out in a couple of minutes.
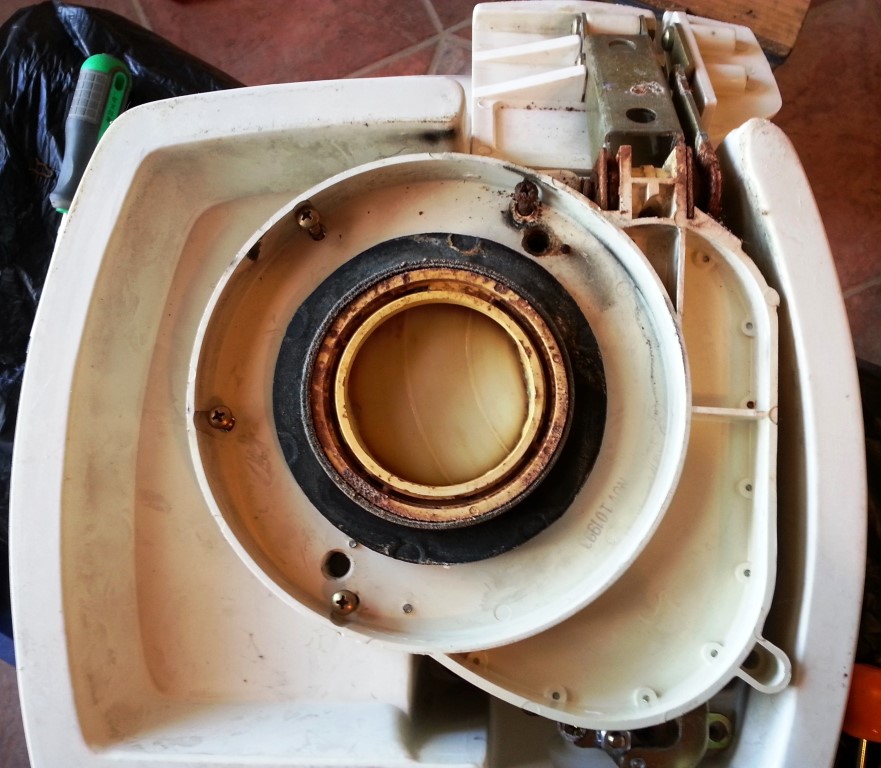
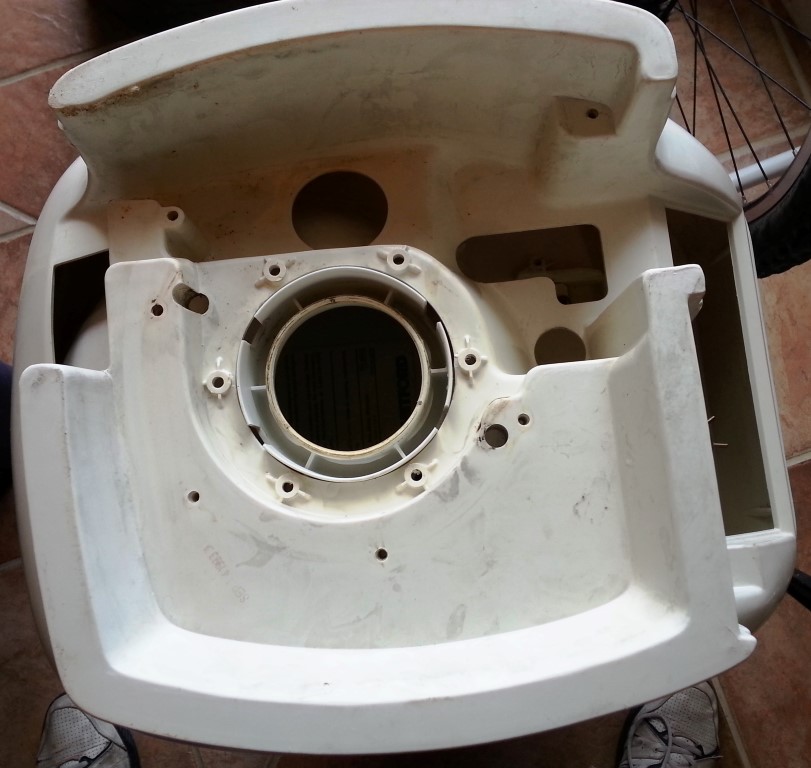
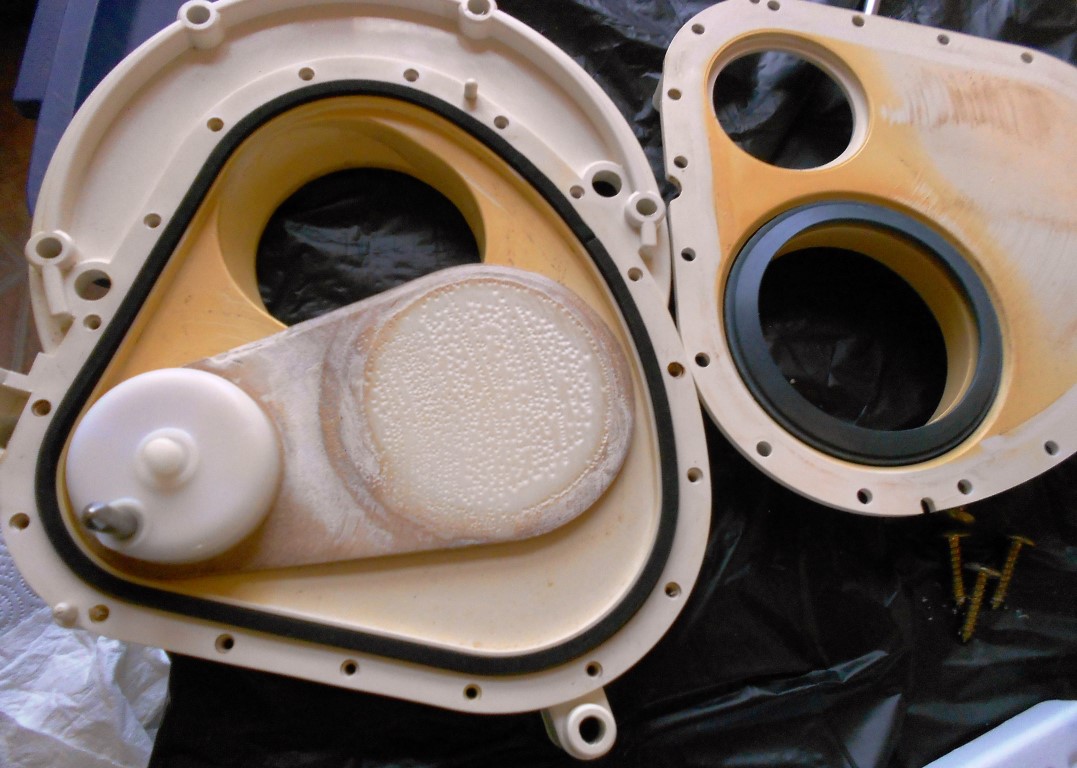
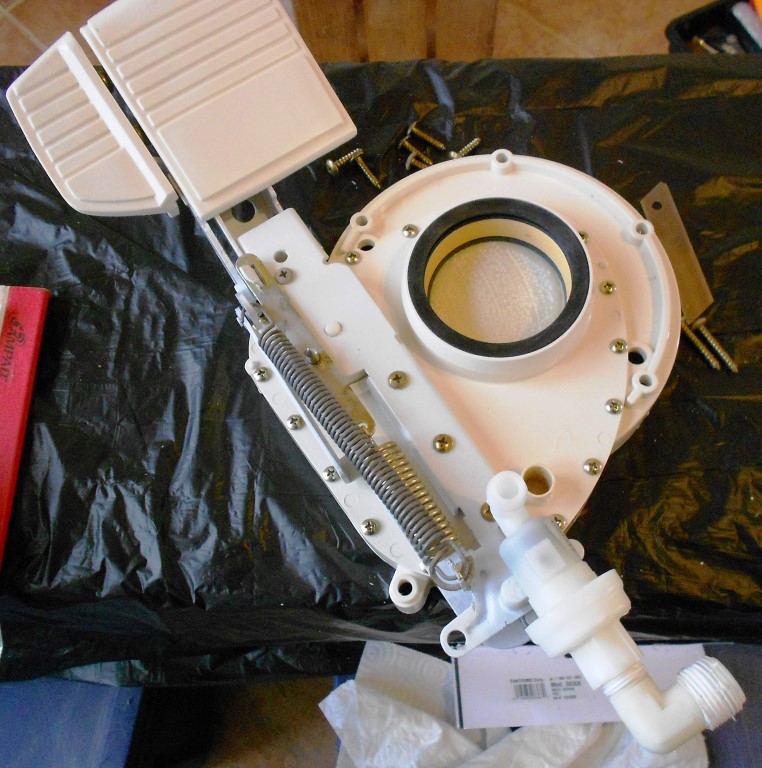
Disassembling the toilet is pretty straight forward. Several layers of screws and a layer/section of the toilet comes off with each set of screws. I can assure you that disassembling and cleaning a toilet that has been in service for many years is not glorious work. Mine wasn’t too bad but I still scrubbed and “sanitized” for quite a while. I found several things kind of interesting. First, some of the metal parts were mighty grimy and corroded. I can imagine that some urine made it’s way onto these and did the damage. Second, the pivot point of the two handles (flush and water) was extremely worn. Two thin plastic bushings are used at this point. One of them was completely gone and the other was worn all the way thru and broken. Finally, a previous owner had used silicone to semi-permanently attach the bowl component to the outer shell – the final two parts would not easily come apart. Nothing was leaking there so I elected to leave it alone. The only negative being that I could not replace one length of hose that was fairly ugly looking.
I removed all the rubber seals and o-rings and put them aside in case the overhaul kit was missing something. It quickly became apparent that these rubber parts pick up and retain a smell (not a good one). So, into a sealed bag they went. After that, I no longer smelled things that made me think I was working on a toilet.
A couple short lengths of tubing carry water from one part to another – mine were very old and hard. I replaced them with new tubing – except for the one previously mentioned.
I rummaged thru my spare parts bin and found two brass/oilite bushings that were close to a match for the foot pedals. Actually, they weren’t very close so I thru them in the lathe and made them match. I also had to ream the metal parts to fit the new bushings (very slightly).

The metal parts are a coated with sort of a nickel finish but the corrosion had eaten thru it. So, I cleaned these parts very thoroughly and then primed and painted them white. This was for corrosion protection more than appearance as you can’t really see these once the toilet is assembled.

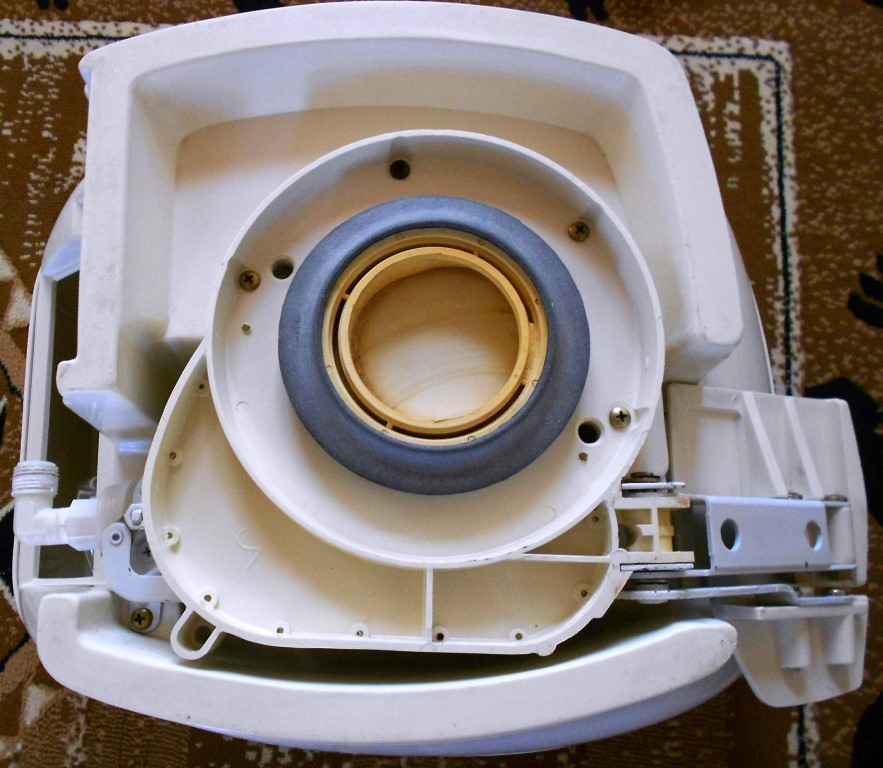
After everything was cleaned and secured it was a very simple matter to install the new rubber seals and screw everything back together. I was very pleased that exercising the pedal assembly felt very good – solid and without wobbliness (that’s a technical term). The new bushings were working brilliantly!
Before re-installing the toilet in the motorhome, some cleaning was necessary. The entire area was scrubbed, the old caulking removed, and seams re-caulked. Then the “new” toilet bolted back into place.
Currently the motorhome is winterized so I am unable to perform a very good test. However; a little water poured into the bowl seems to stay for several hours. That is a significant improvement. I am pleased and will call the overhaul a success!

Hello, and thank you for your post as I have the same toilet. My problem is I can’t see the bolts holding it to the floor/holding tank. I don’t suppose you have any pics of that you could possibly send me? Thanks for anything you have.
Howdy Paul. It has been a long time but I found the following photo. Hopefully it helps. I don’t recall how I accessed those bolts – maybe thru the opening in the back of the toilet??