My RV-4 has suffered from high oil temperature during the warmer summer months when the outside air temperature is up. I find this rather bothersome so I decided to do something about it.
The stock oil cooler location for the RV-4 is with it bolted onto the cylinder baffles behind cylinder #3. This is less than ideal as it places the oil cooler within a quarter of an inch of 350 degree cylinder fins. It also places a lot of stress on the thin sheet metal baffles.
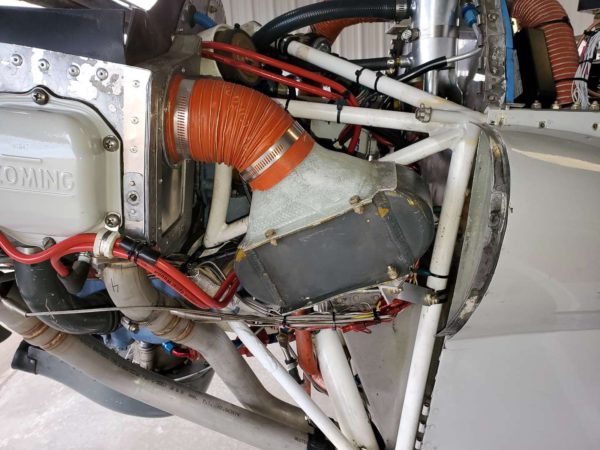
A better solution is to mount the oil cooler on the firewall or motor mount and run a length of SCAT tubing from the baffles for cooling air.
Significant re-work and moving of components would be necessary for me to mount the cooler on the firewall. I wasn’t excited about that – so I chose the motor mount approach. I also decided to upsize the oil cooler hoses from AN-6 to AN-8.
I’m currently located in a rather rural place and shipping things here takes a week. So, between parts orders, I had plenty of time to think. Of course, this leads to the dreaded ‘while I’m at it’ syndrome. This time around, while I’m at it resulted in installing a new Vetterman 4 pipe exhaust system, revised flap actuator mechanism, revised fuel pressure sensor hose, stripping and painting the rocker box covers, re-hosing the engine breather and a new cabin heat muff.
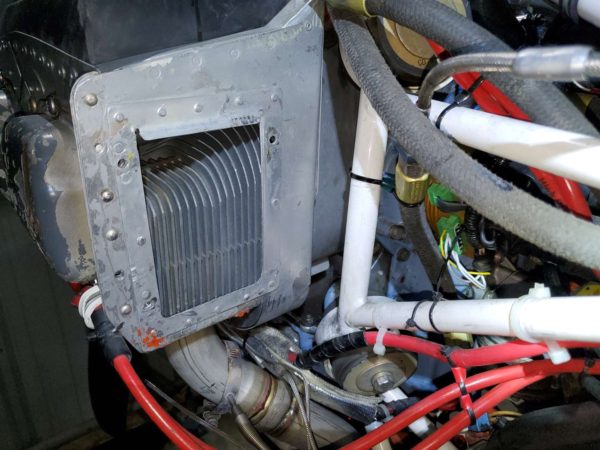
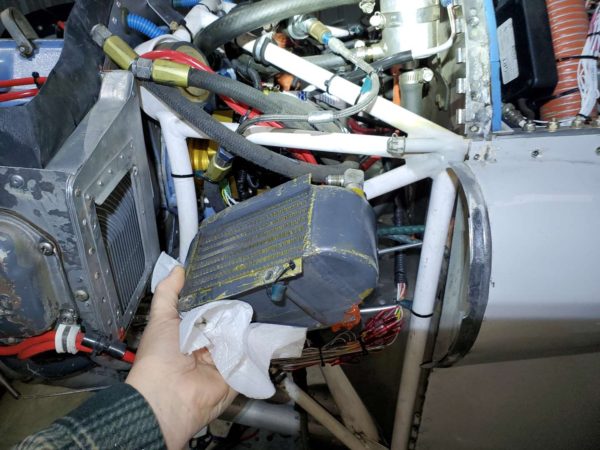
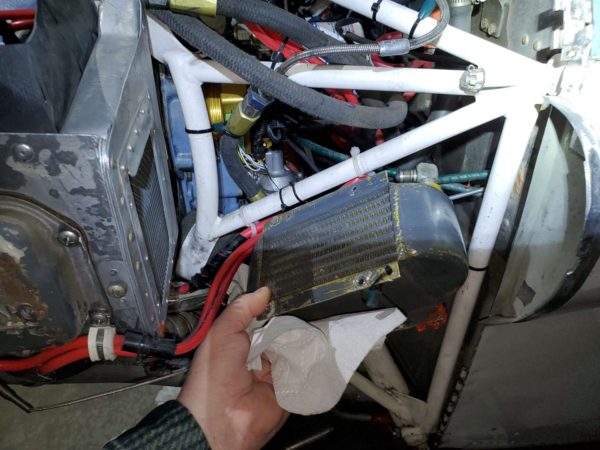
The first step was removing the oil cooler to see what I was working with. As you can see from these photos, the baffles were cracked in a couple of places and the pressure placed on them from the weight of the oil cooler was causing a lot of wear. I’m glad I didn’t delay this work!
The really amazing thing to me is that this looks more like an engine oil heater than a cooler. A great deal of air must have been passing thru those hot cylinder fins and then into the oil cooler. It’s little wonder why the oil temperature was high.
A bit of time eyeballing possible positions for the oil cooler led to the formulation of a plan.
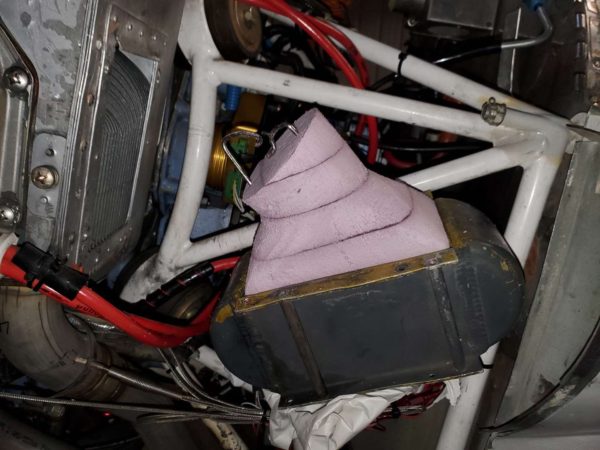
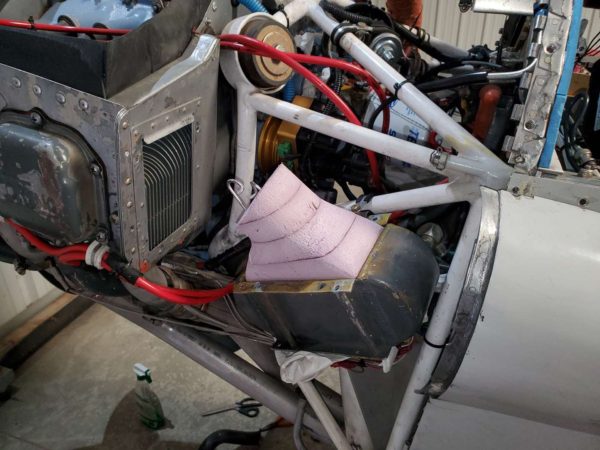
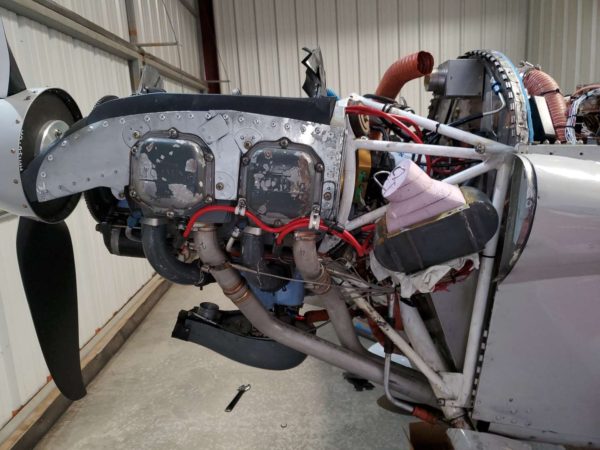
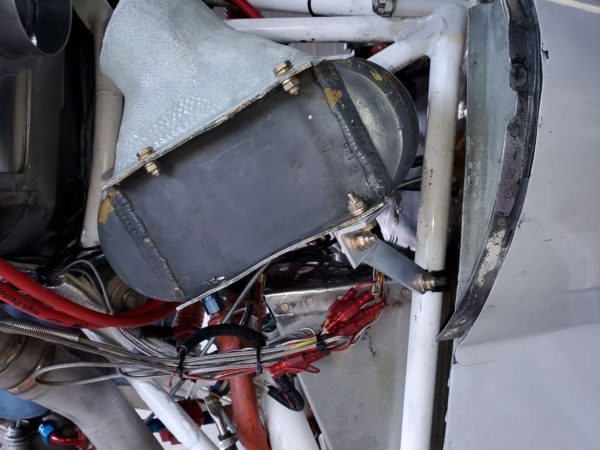
Fabricating an air duct for the oil cooler was next. This started as a foam mold shaped to fit the oil cooler and align an air hose to the point on the baffles from which air would be picked up. This mold was then fiberglassed.
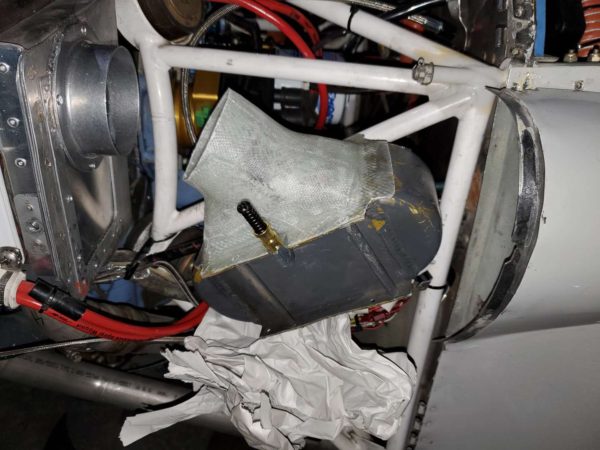
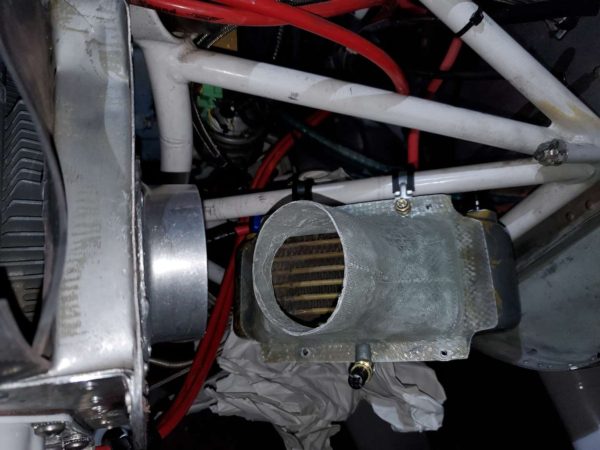
After a bit of fitting, a fiberglass flange was added to secure the duct to the cooler and to create an air tight connection.
The cracks in the baffles were repaired and a 3″ aluminum ring installed to which the air hose/duct would connect.
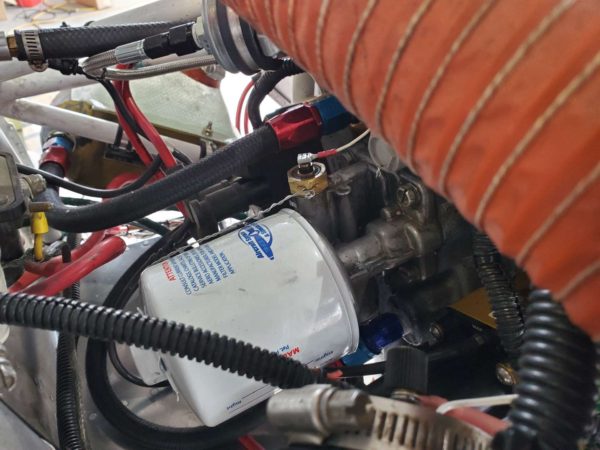
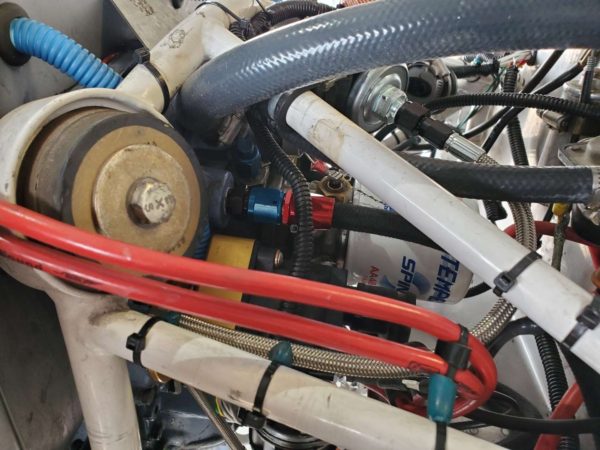
I usually find any work on the back of the engine/accessory case to be a bugger. Access is just not great back there. Getting the old -6 fittings removed and the -8 fittings installed took some time… and patience! The fittings are just barely visible in the next two photos – they are the blue and black fittings to which the blue/red hose ends are attached.
New -8 oil hoses were fabricated and installed.
Doesn’t take long to describe but it sure took a lot of time to actually do!
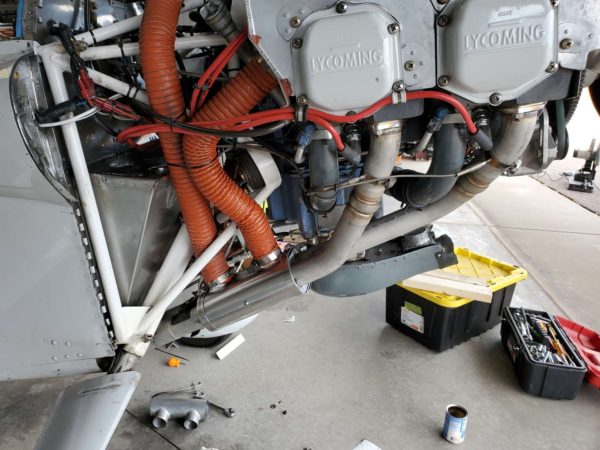
The exhaust system installation was pretty simple. You can see that coming together in the photos above. I really like not having those pipes wrapping around the front of the engine and so near the oil sump. The four pipe system is very simple and clean. A new, two-pipe cabin heat muff was also installed.
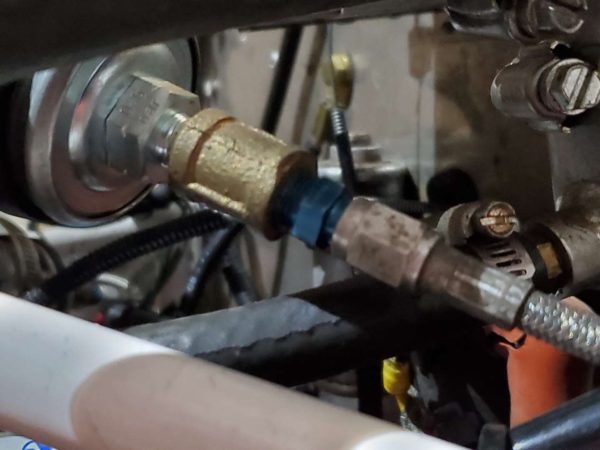
This is the fuel pressure sender. Note that there are two adapters to get from AN-3 hose to 1/8″ NPT – this type of thing really bugs me. Yes, I did that initially and it has worked fine for several hundred hours. Nonetheless, it was time to clean it up. A single 1/8″ NPT to AN-3 adapter was needed. I reduced the number of possible leak points from six to three – that makes me feel better. 🙂
Once the work was complete, a couple of test runs on the ground were completed. After ensuring that there were no leaks and everything was secure and operating as it should, the cowling was installed and it was time for a test flight!
Did it work??
Well… it’s too early to be certain. The outside air temperatures are still relatively cool. I’m anxiously waiting for some nice warm summer temperatures! However; even with the current temperatures, it does seem that the oil is running cooler. I’ve conducted a few tests (extended steep climb and extended maneuvering at very slow airspeed) that would normally result in high oil temperature and they it didn’t move above the thermostat (vernatherm, to use Lycoming terminology) temperature of ~180 degrees.
No… I didn’t bother to finish and paint the fiberglass oil cooler duct. I will, eventually, but I want to confirm that it works before spending any time “polishing” it.


If this doesn’t work to your satisfaction, try a set of Van’s cowling louvers mounted on the bottom of the lower
cowling. Dropped my oil temperature 15 degrees. I have a firewall mounted cooler too.
That was a lot of work Sir. I do not miss it but enjoy all the mods you do. Thanks for posting so we recliner pilots and mechanics can enjoy it.
Thank you Thom!
How has your relocated oil cooler on your rv-4 worked out with warmer summer temps? I also have an rv-4 with an O-320 and never had oil temp problems. But I recently changed to an ECI O-340 (180hp) and now have very elevated oil temps. Also, I can’t tell from the photos how large your oil cooler is. 7 row or bigger?
Hi Ivan. The change certainly helped with temps. However; it didn’t completely eliminate all issues. I wish I had empiracle data to share but I wasn’t that thorough. Now, when OAT temps are warm (75-80F degrees), the oil temps are still warm-ish. At 8,500′ cruise (2450rpm, leaned to ROP), oil temp will still slowly climb to 220F. I can run a bit more fuel thru the engine to lower them a bit or run LOP (which causes them to drop significantly (190F oil). It is very ‘controllable’ so I don’t worry about it much.
I wish I knew why some RV’s have no issues and others do. I suspect it is an interesting combination of baffles, spinner gap, cowl exit, density altitude, fuel distribution, vernatherm operation, and ???