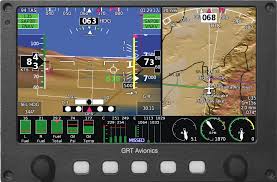
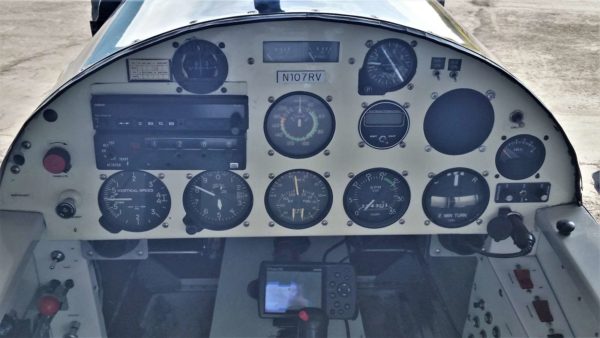
I’ve been “stretching” my brain a bit lately. A whole lotta bits actually… I plan to build a new instrument panel for my RV-4 and install modern avionics such as this Sport EX EFIS (electronic flight information system) from Grand Rapids.
This type of instrument (EFIS) combines a whole slew of old-style instruments into one computer display while adding a bunch of additional data.
The ‘old’ way of doing this would have been to get a chunk of sheet aluminum, mark and cut the desired shape with a bandsaw, then mark it with hole locations for the new instruments, and then either cut them out with a hole saw or punch them out with a special sheet metal tool.
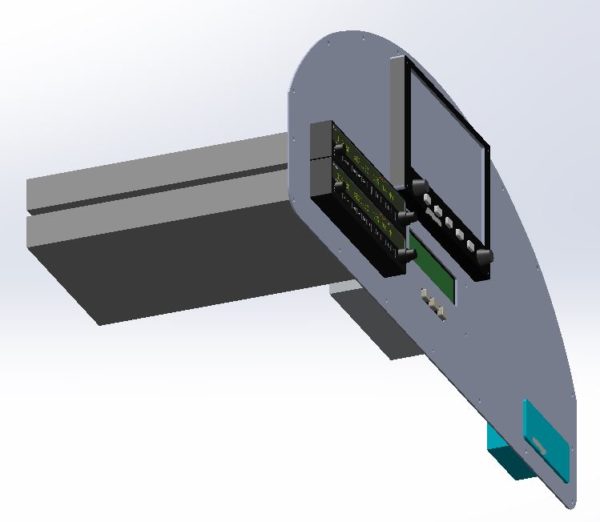
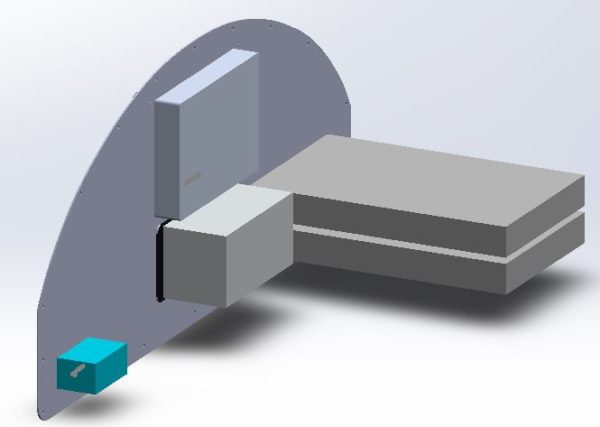
These days, we use computers… A 3D model of the instrument panel and each instrument is created, it is all laid out as an assembly, and then the chunk of aluminum is taken to a water-jet cutter to precisely cut out the panel shape and all the cavities.
How does one create a 3D model? Well… you have to get your hands on a tool and start the VERY steep and painful learning curve. In my case, I have access to SolidWorks so that’s what I used. I knew I was in trouble when I opened SolidWorks and couldn’t even draw a line. 🙂
It has taken many hours of study to gain the tiniest bit of understanding about SolidWorks but it has been enough to create the following – my new RV-4 instrument panel!!
I’m about the least knowledgeable person on the planet regarding SolidWorks so I’m not even going to attempt to describe how it works. However; I will say that is an amazing tool! The neatest part is that once this all the individual parts are drawn and connected, the cavities and holes in the instrument panel are automatically created.
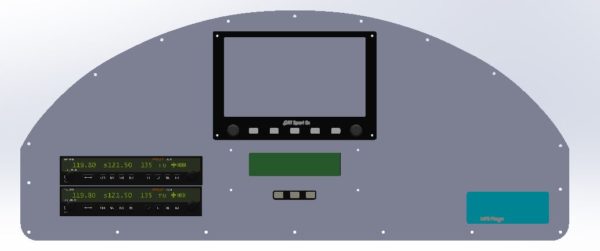
Looking at this photo of my current panel, you can see that things are greatly simplified!
Now I just take the raw aluminum sheet, the drawing, and my credit card to the water jet cutter and I’ll have a work of art in hand!

Of course… then I must begin actually purchasing the new avionics… 🙁 I’m not ready for that phase yet.

I took a one hour flight lesson last week and something like that was all I had. Granted it was the first time I had seen it. I thought it sucked big time. Give me steam gauges anytime over that. I may change my opinion after a few more flights, possibly not though. Airspeed in numbers on left and Alt in numbers on right and not so good ball at center lower, HSI in the center and bearing and G meter on top. Confusing as crap after a snap roll or tumble.
That’s one of the many advantageous of Sport Aviation – you can build the aircraft that you want and tune it to your liking! Definitely a win-win!
WOW
My brother is so smart.
No… no. It is the computer that is doing all the work. I’m just pointing and clicking on stuff. 🙂
Wondering how much they charged to cut your panel. And who did it. I am looking to upgrade my RV9A panel and need a source for cutting it. I already know how to do CAD and have the design completed.
Thanks, Dick Tasker
Hi Richard, I never actually had the panel cut. Too many other things got in the way and that project is still waiting. I called a local water jet shop and, as I recall, they said they would do it for $200. The project sounded small to them and that was their minimum charge.