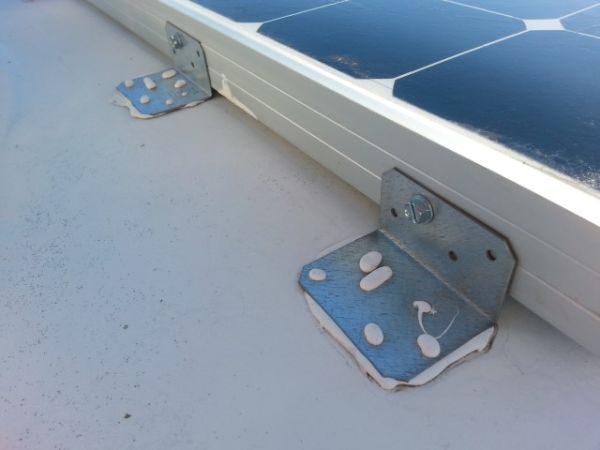
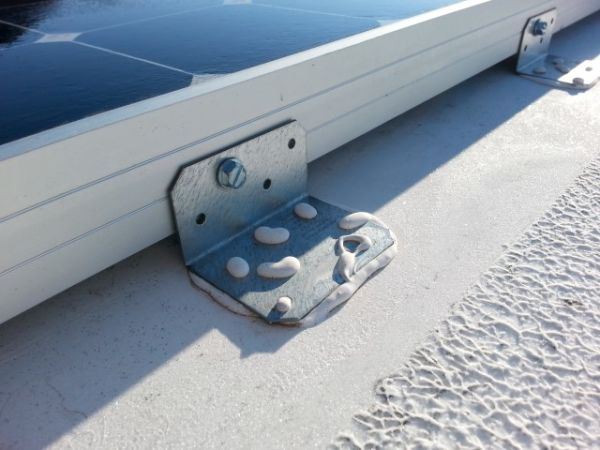
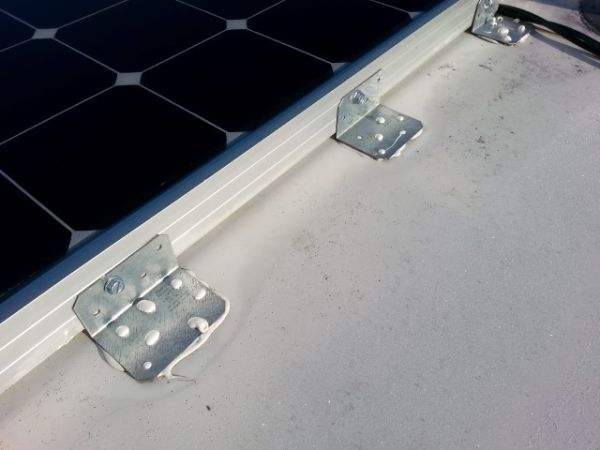
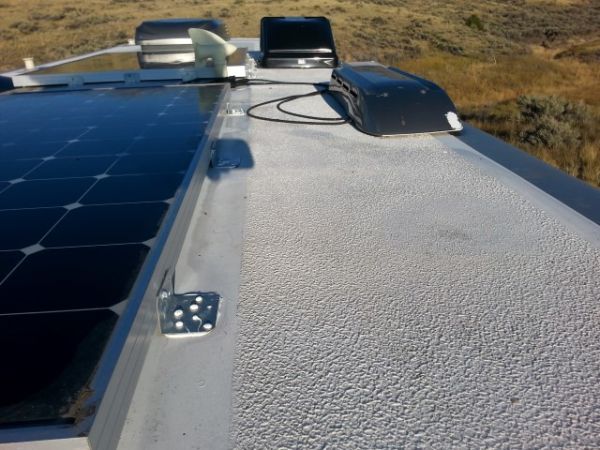
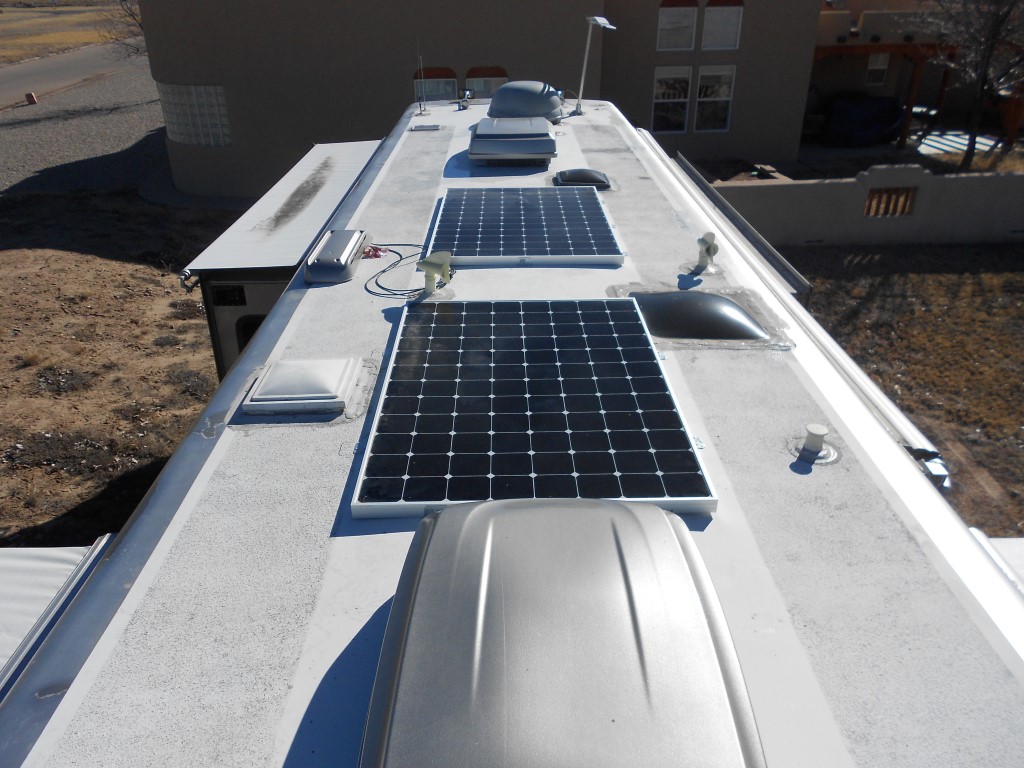
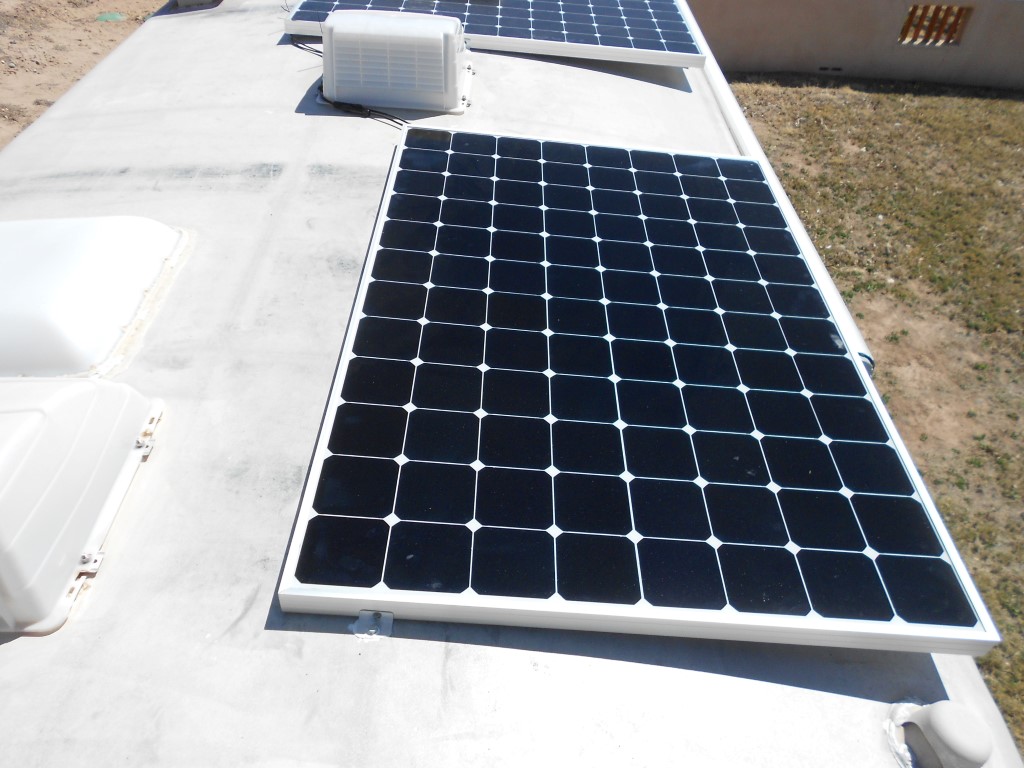
Several people have asked for more details, especially photos, of my solar panel mounts. These mounts were originally referenced here during the system installation on my Newmar Dutch Star.
I have had zero issues with these panel mounts.
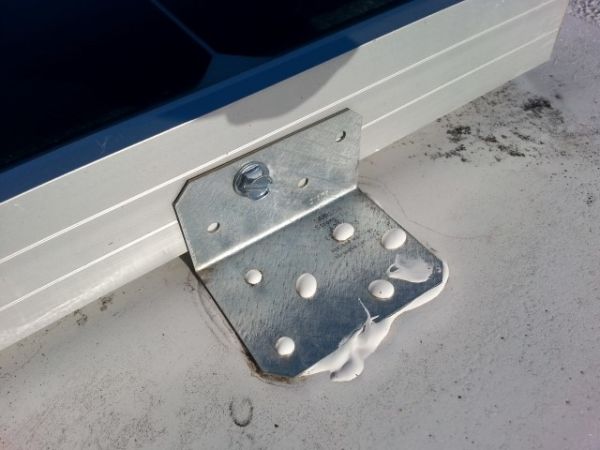
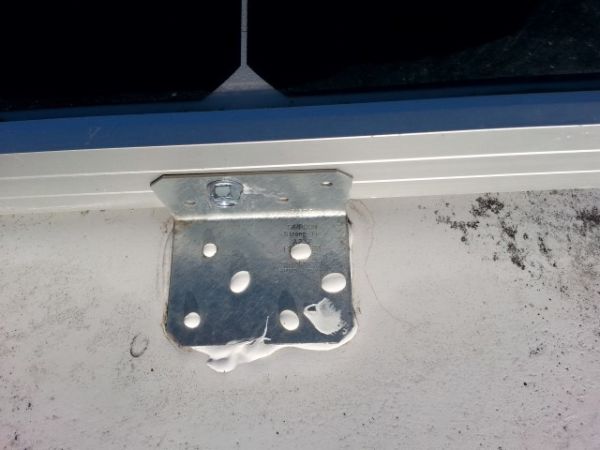
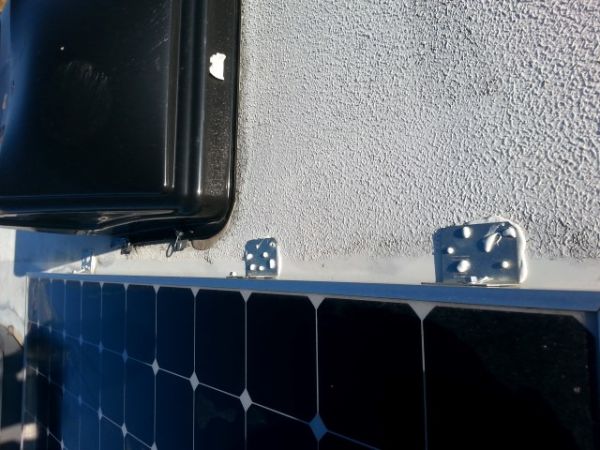
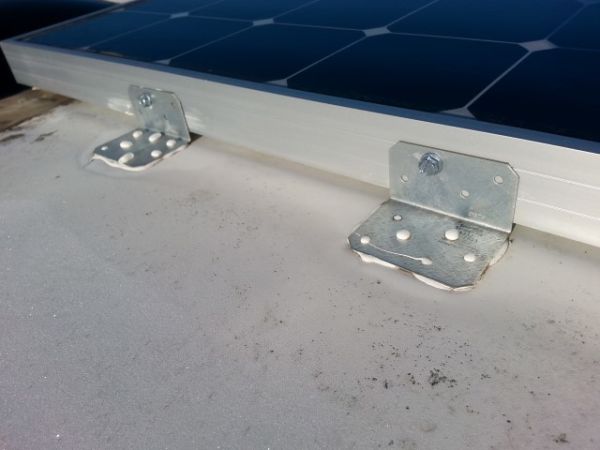
The two panels have been mounted with the solar panel mounts as shown below for six months and have traveled approximately 9000 miles (mostly Interstate/highway but some gravel roads).
Note from JD (07/12/2017): I have sold this motorhome and the current owner reports that the panels and still firmly mounted after several thousand more miles of travel. I tried some different panel mounts with the panels on my current motorhome. Take a look at those here.
A few important notes:
- 3M 5200 adhesive was used. This is an adhesive, not a sealant. It is incredibly strong.
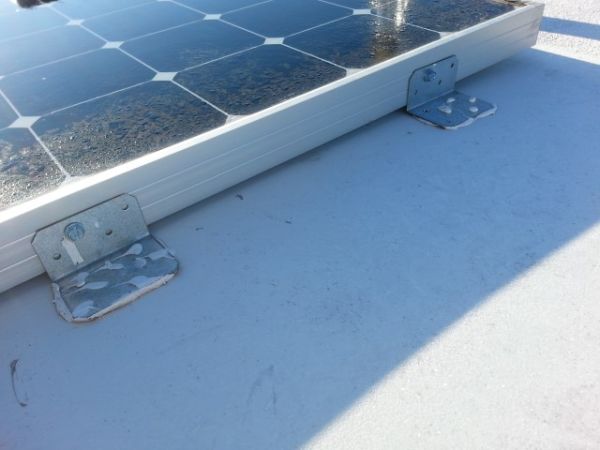
- The brackets were purchased from Lowe’s and found in the sheet metal department. They are galvanized steel (of some sort).
- One sheet metal screw per angle bracket was used (into the panel). Those holes for these were pre-drilled. The frame on my panel is basically double wall so I used screws long enough to go thru both inner and outer walls.
- Several small holes were drilled in the foot portion of the bracket to give the adhesive more contact/bleed thru area.
- The bottom of the bracket feet was roughened up with some 36 grit sandpaper to give the adhesive more bite.
- The fiberglass roof surface where the adhesive would make contact was also roughened up.
- A very thick coat of 5200 was used on the bracket foot and then pressed into place. It was not pressed down so hard as to squeeze out all of the adhesive, but almost.
- An air gap between the roof and panel is necessary for cooling. Some will argue how big this gap must be.
- The air loads close to the roof while cruising down the highway at 65 mph are not very high. One has to have a basic understanding of aerodynamics, including boundary layers for this to make much sense. However, it is the reality. The bigger concern to me was air atypical air loads from other big vehicles on the highway and wind storms.
There is no doubt that there are several arguments that one must consider when devising your own panel mounts:
- Are you happy with flat mounted panels? Some folks want optimal power from their panels (perhaps they have very limited roof space) and are willing to spend the money and time to create a mount fixture that allows them to tilt their panels so they are always perpendicular to the sun. This type of solar panel mount works, without a doubt. However; I have no interest in the cost, weight, or complexity of such a mount. Nor do I want to run outside to manual change the tilt of the panels every hour to keep up with the sun.
- Do lag screws, metal screws, or bolts make you feel better? If so, by all means, run some big ‘ole bolts thru the roof. Since most roofs are pretty thin, it helps to find the structure underneath and run the bolt/screw into that. A big lag screw into 1/8″ plywood is not worth much when it comes to holding power. Be absolutely sure to get those bolts COMPLETELY sealed.
A few of the brackets “lifted” a bit while the adhesive was curing. I’m not sure if the adhesive expanded or if I disturbed them. In any case, the bracket is still very firmly attached to the roof.


Leave a Reply