The old carpet and linoleum in Shaneeda had served valiantly but it’s time had come. It was matted, dirty, torn, stained, and just nasty – very nasty. I wanted to keep putting it off but I couldn’t – it was time to replace the flooring.
For many months I have agonized over whether to install carpet, vinyl sheet, or cork laminate. My motorhome is weight limited so a light solution was required. I really like the feel, warmth, and quiet of carpet but I hate the way it seems to attract dirt and sand. I love vinyl for it’s simple installation, easy cleaning, and resistance to dirt/stains but it can be so cold. The cork laminate was hugely attractive in terms of warmth and quiet but the installation and cost were not. Cork is also not quite as resistant to water as vinyl. What to do…
A trip to Lowes helped me to find a vinyl sheet color/pattern that I liked (Armstrong Sedona Clay Stone, Ashton Collection) and I discovered that the new options are rather thick and cushy – not thin and hard like linoleum. I liked that but realize it isn’t padded carpet. The final straw was learning about the “lay flat” installation. It does not require a bunch of adhesive. One simply lays the vinyl down and apply double-sided tape under the edges. VERY simple! I was sold.
Removing the interior is a bit of project since everything is bolted down pretty well. The couch, recliner, fold out table, dinette table and chairs all had to be unbolted and removed. Next came all the trim, heater vents, and other small items.
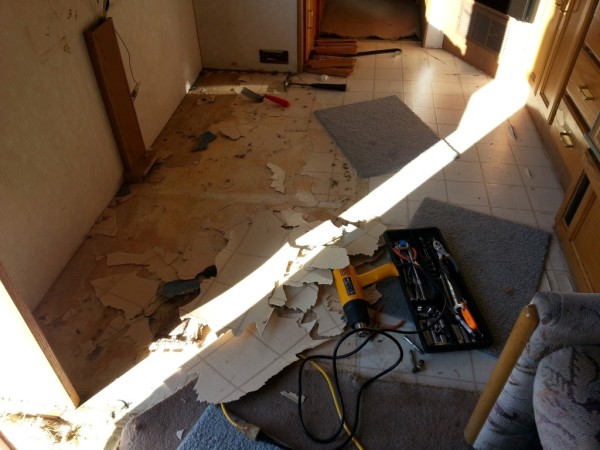
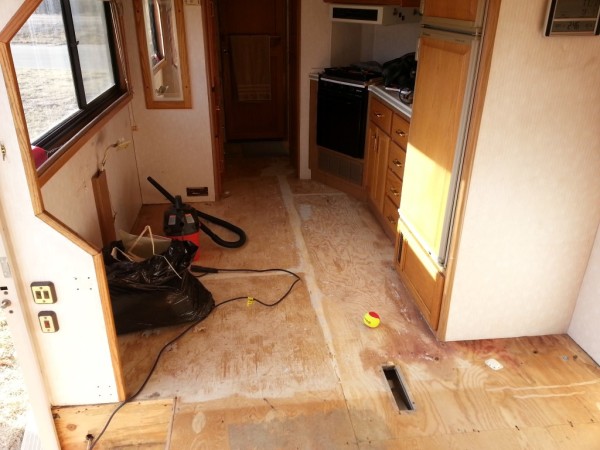
First thing on a Saturday morning I started ripping out the old flooring. The old carpet and padding was quick to come up – just pull, cut, and rip. The linoleum was much more work. It had been glued down so it came out in small pieces and lots of scraping was required. Fleetwood installed the linoleum before the cabinets so they were sitting on the flooring. I cut the linoleum as close to the cabinets as possible and left what was under them. The carpet (and some of the linoleum) is held down with staples – lots and lots of staples. By far the most time was spent crawling around the perimeter with vice grips, needle nose pliers, and small screwdriver pulling all of these staples out. There are literally hundreds of them and this is a very time consuming process. However; like many things, the preparation is very important to the final product so I took my time and got all of them out.
The two items that caused me to pause and contemplate what to do were the bolts for the recliner couch seat belts. All of these bolts have their heads welded to steel plate under the floor and protrude up thru the floor. I am getting rid of the old recliner and getting something more modern so the bolts would not be reused. I cut these four bolts off and ground them flat/level with the floor using a hand grinder. The couch seatbelt bolts were up against the wall and I couldn’t decide what to do so I left them. They are out of the way so should be fine.
The vinyl sheet comes in twelve foot widths. The inside floor width of my Pace Arrow is seven and a half feet wide. So, I purchased one eight foot piece and one seven foot piece. I started in the living room, laid out the vinyl and started trimming. I was a bit nervous about this step as I could imagine really screwing it up.
I started by aligning the sheet against one wall, making sure the pattern was straight and then trimming the excess material but leaving a bit of excess. This allowed me to get the sheet laid down and mostly “fit”. I then came back around the perimeter doing a close trim. The instructions say to leave one quarter inch of space so a super close fit is not desired. Easy enough.
I was worried about the next step. Getting a seven foot wide by twelve foot long piece of vinyl to line up with the piece already on the floor, get a good seam, and somehow trim it to fit in very last couple feet of kitchen, hallway, and bathroom. I started by figuring out how much length I needed and cutting the whole sheet to that size (down from the twelve foot length. The remainder was unrolled in the hallway and large cuts were made leaving lots of excess but trying to achieve an approximate fit. This worked pretty well. The vinyl sheet instructions (from Armstrong) are pretty clear on how to seam the material. You basically overlap it and then make a straight cut thru both pieces, remove the excess material and then double-sided tape the underside. This worked great and the seam is nearly invisible. Final trimming in the hallway and bathroom took lots of time as there are so many little nooks and crannies.
The entry steps were next. I really wasn’t sure how to approach this area so I just started – sometimes that is better than overthinking it. I cut pieces of vinyl sheet for the step treads, then the risers, then a piece for each side wall. For some reason, the sidewalls nearly defeated me – took me half a dozen attempts to get it right – good thing I had lots of extra material!!
Finally, I made a pass around the perimeter installing the double-sided tape. The result is very nice. I really like the new look – I really like having the old torn up and stained mess gone!
I have not yet decided what to do about trim so that part of the project is unfinished.
A real negative to this project is that the carpet in the cockpit and bedroom now look REALLY BAD!! I thought they were bad before, the new floor has made them worse. What to do….
Note from JD (06/30/2017): In my latest motorhome, Missy, I have installed the cork plank flooring that I thought about above. Details are here.

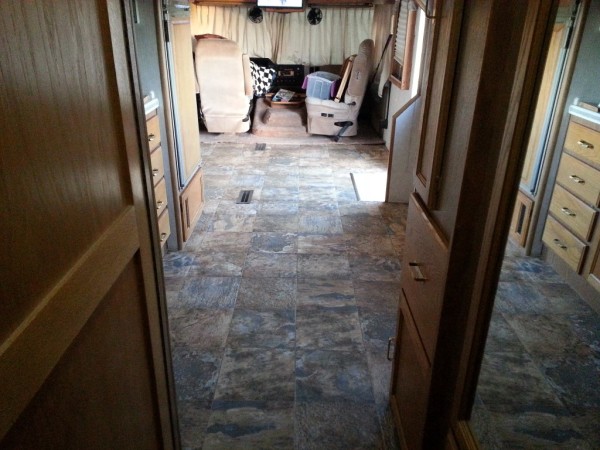
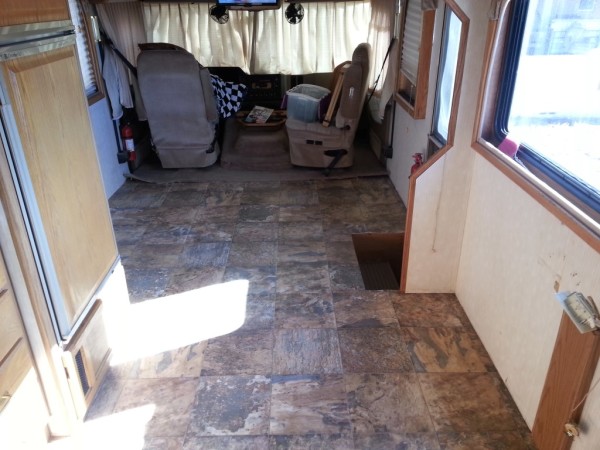

[…] of my friends took a look at my new vinyl sheet flooring in Shaneeda. They all loved it but all commented that the carpet around the front seats and doghouse […]