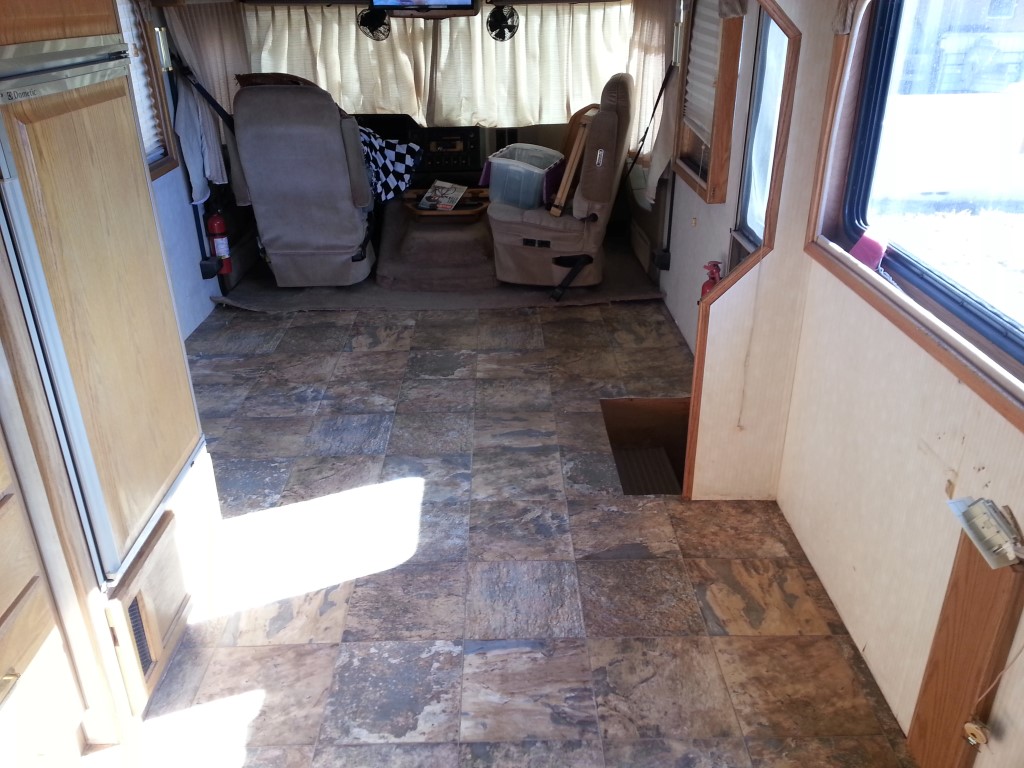
Several of my friends took a look at my new vinyl sheet flooring in Shaneeda. They all loved it but all commented that the carpet around the front seats and doghouse had to go. Ugh… just another project right!?!? So, I started ripping that carpet out…
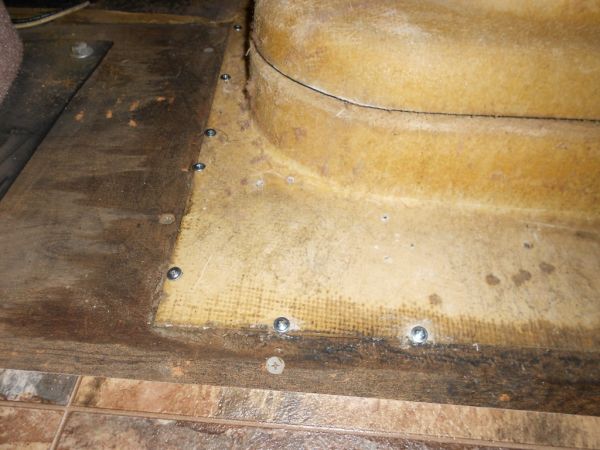
For those not familiar, my RV is a Fleetwood Pace Arrow Class A motorhome which is a gasser. This means that it has a gas engine (as opposed to diesel) that is situated in front between the driver and passenger seats and is enclosed by a cover that is lovingly called a doghouse. The carpet is glued to the doghouse and is not terribly easy to remove. Making it worse, the hinges and latches were riveted to the cover thru the carpet. And dirty?? Wow – very nasty. I was actually glad I pulled it out but I knew installing new carpet would be a serious pain in the rear. To remove the latches, I had to cut the rivets off from the backside. This was not easy and ended up being accomplished with wire snippers, screwdriver, and vice-grip (low-tech). Of course, this is all much easier with the seats removed. I elected to leave the seat bases in place (carpet goes over them) and remove both seats from its base. This requires removal of four nuts (plus unbolting the seat belts) and is an easy one person job (as opposed to removing the bases which is a two person job and much more work). After the normal removal of hundreds of staples, scraping, and cleaning; the real work started. 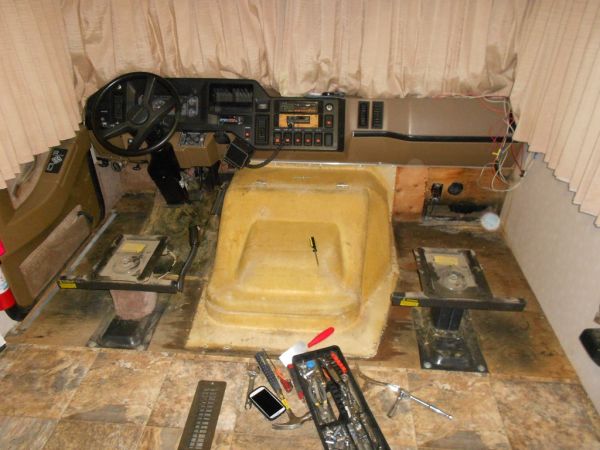 The doghouse is a fiberglass “box” that was attached to the floor with sheetrock screws. These screw heads were sticking up all around doghouse, at least a quarter inch. Additionally, there were a bunch of other screws who’s only purpose seemed to be holding carpet down at the 90 degree “bend” where the floor and doghouse meet. I could not stand that. So, I removed all these screws and replaced the ones that were holding the doghouse in place with truss head screws which fit nearly flush. Another problem I noted was that the carpet was installed “into” the joint where the doghouse and cover come together. This was preventing the cover from closing completely and the rubber seal doing much of anything.
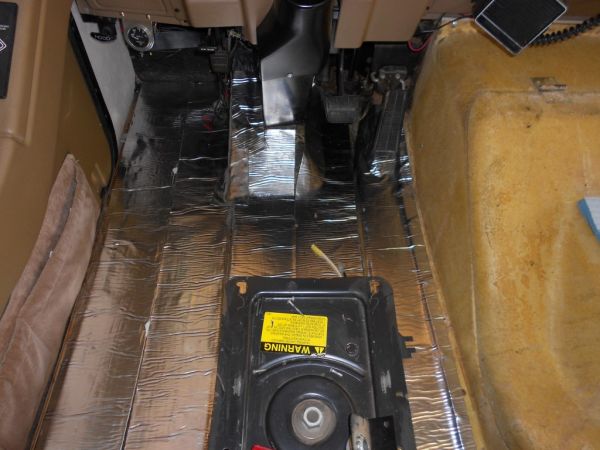
  The first thing laid on the floor was a layer of dynamat insulation in the cockpit area. My goal was to provide some amount of insulation from heat/cold but mostly to eliminate some road/engine noise while driving. I really wanted to apply a layer of this to the doghouse but I could not imagine how I would get the carpet to stick to it so abandoned that idea. I will later experiment with putting the dynamat on the under/engine side of the cover – not sure it will stick there (hanging and exposed to lots of heat).
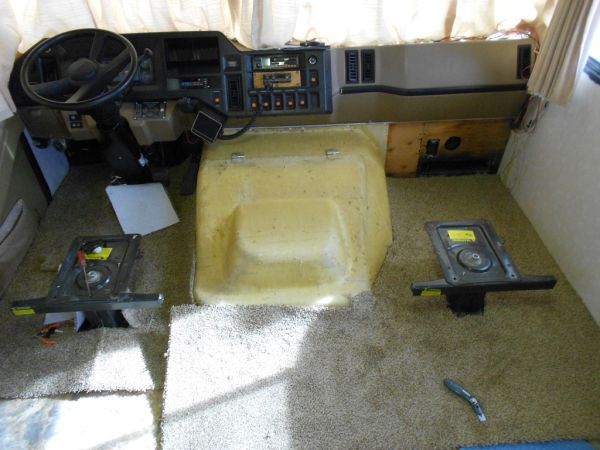
  The carpet padding was next – pretty simple. I’m really not very good at getting carpet installed in tight spaces with lots of nooks, crannies, and angles so this whole process was very time consuming and laborious. That said, I took it as slowly as I could and tried really hard to make it look good. I quickly gave up on the idea of using a single piece of carpet. Instead, I focused on one large piece on the passenger side and another on the driver side covering as much of the floor as possible. This is easy on the passenger side but the driver side has a lot more angles so this is pretty hard (for me). Eventually it was done and time to attack the doghouse. My initial approach on the doghouse was to stare at it and hope the carpet would jump on, conform, and glue itself on – kind of a Jedi mind trick thing. After waiting a good bit of time, this did not happen so I went with plan B. I started on the part of the doghouse that is firmly attached (not the cover) and worked my way around fitting the largest pieces possible. All of this was then glued in place with contact cement. After drying, the carpet was trim around the cover/door.
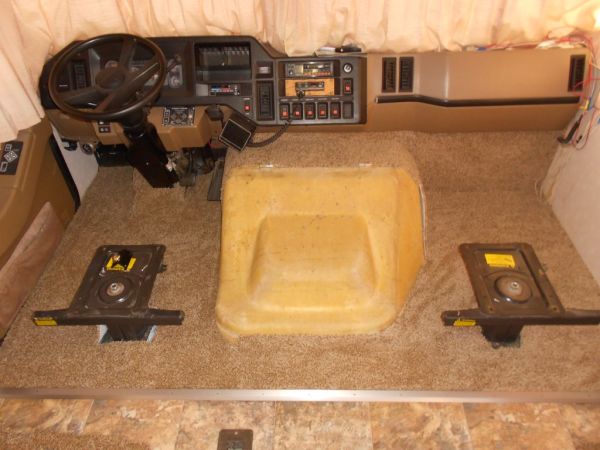 The doghouse door/cover was the real challenge – lots of angles. I took one large piece of carpet (which wasn’t large enough – use plenty of carpet) and started fitting at the top. Working my way down the sides and cutting the carpet where it would not conform to the shape. I then used the heat gun to warm the carpet and sort of mold it in place. This worked to some extent in that it helped the carpet lay flatter than it wanted to on its own.
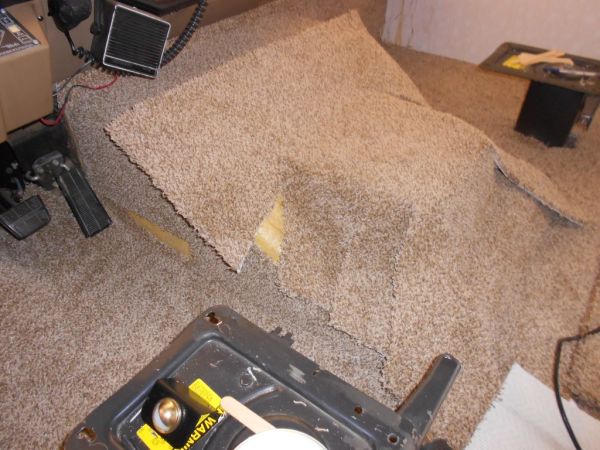
 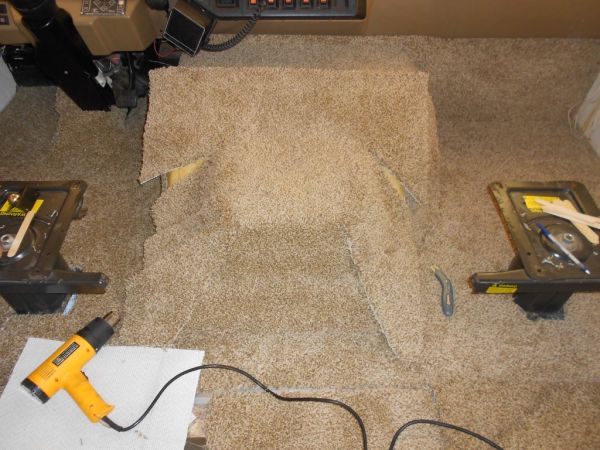 Contact cement and I do not usually get along very well. Typically, the cement likes to get onto a whole bunch of things that I don’t want it on – I’m not sure why. This time, I took it very slow with this cover. I marked on the cover the area that would be glued first. Due to the shape and all the little slices, I could not properly fit the entire carpet all at once – at least not with my skill set. I applied glue to the cover and pieces of the carpet that I wanted down first. This was then applied to the cover. Once set, I began fitting the little tails of carpet – trimming and fitting them as I went along and cementing them only after the previous pieces were stuck down and I had achieved a tight fit. Finally, small pieces of carpet were fitting to fill the few remaining bare spots. The carpet was trimmed at the joint of the cover such that it no longer prevents the cover from closing all the way. Now the rubber seal is ‘engaged’ – hopefully the engine noise will be slightly decreased.
  I am very pleased with the results! It is not perfect but for me, it is pretty good. If one looks hard enough, a few of the seams can be seen but from a couple feet away, it looks very nice! I used a pewter colored transition to the vinyl flooring that looks pretty good. In hindsight, I wish I would have left enough carpet to do a foldover and staple which is what I did in the bedroom. No matter, it looks a thousand times better than it did before.
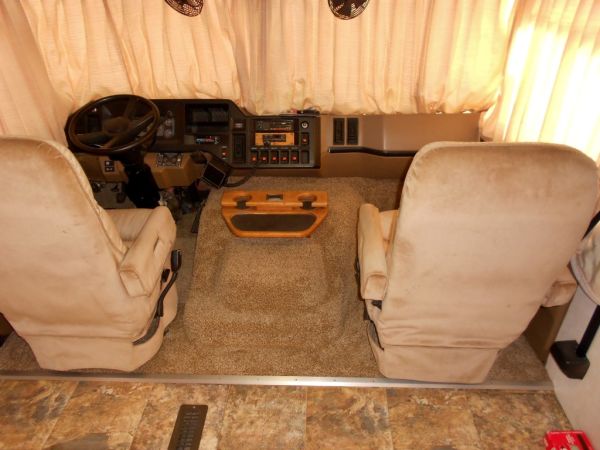
Even my friends like it! However; they are now telling me the wall paper needs updated. They are not allowed in my RV any longer….
In total, I was able to install new flooring throughout the entire RV for approximately $600. The vinyl sheet and tools were about $250.00 The carpet, padding, and tools were also about $250.00. The trim (all new) and extra carpet for rugs was about $100.00.



Hi JD
I have been working on my own RV flooring project and am now working on the doghouse. Just hope mine turns out as good as yours. Would like to know, how did you remove residual glue/cement from the fiberglass doghouse? Yours sure looks cleaner than I have mine. And what glue/cement did you use for the new carpet on the doghouse? Some time having an RV is a full time job!
Harold
Hi Harold. Thank you! I did a fair bit of scraping using a couple of different putty knives. I didn’t want to damage it but sure seemed like getting some of the old glue and material off would be a good thing. I just used standard contact cement to apply the new carpet. It kind of stinks for a while but eventually go away.
THanks for this post. I am getting ready to recarpet my dog house and found this informative
JD, very impressive. We’re thinking of doing the same thing. The we, my wife handling the supervisory aspects and me, doing the pulling, cutting, gluing and laying. Still debating whether or not it makes sense. We’re just going to sell it anyway. It’s a 1999 Rexhall 32 foot non slide gasser and I’m not sure if new flooring will help it sell and/or bring in a few more dollars.
Do you have pix of the rest of the new floor in your old Pace Arrow? Our faded blue carpet is beyond the cleaning stage. We’ve shampooed it twice since buying in 2014 but it didn’t really help. So Costco or Home Depot flooring is what we’d use. I’ve done the mud room in our home with the Costco stuff and it turned out pretty good. At least until the laundry tub overflowed. I’ve also tiled 3 floors in the house so have a bit of DIY experience with that. But this is a different animal and like you, I don’t think the Jedi Mind thing is going to work. I’m pretty sure our carpet is only tacked around the perimeter so that should come up with minimal effort. But there’s a section of hard wood floor in the kitchen area. Don’t know about that and not liking the prospect of leaving it as is and having two different kinds of wood floors. Might consider sanding and staining to a similar color. Maybe even a contrasting color. Then there’s the bathroom and bedroom. That’s the most troubling. I’d hate to see nice flooring butted up against old worn out carpet. The wife wants carpet in the bedroom and hallway. So that would mean pulling it up and replacing. Probably not a big deal unless the walls are placed on top of the carpet. So if you have any pix of the rest of your flooring job on this site, I’d appreciate a heads up on where they’re located.
Thanks
GaryB1st
Thanks Gary! Did you spot this post. I looked around for some better “after” photos and am not really finding anything. I sold that coach about 6 months after doing that work. The part that I remember being absolutely miserable was getting all the staples out of the floor. Whoever built it when nuts – I should have counted, probably a thousand or more staples. I hope you are luckier than I!! 🙂
Hi JD, I did find your old post. When I didn’t get your response, guess I need to check that box, I did a google search. Love google. Unless I missed it, I didn’t see much on removing the carpet from the doghouse. I did get the part about, a lot of work. That’s where I’m at for now. I’ve pulled up the old carpet, used it for a template and cut a new piece that fit in quite well. Can’t say that Rexhall put the carpet in after the captains chairs were in place, but I didn’t need to remove them to get the carpet out. I started laying the new carpet yesterday and I’m pretty happy with the results. I have one small piece that I need to seam together. I still need to do some cutting and fine tuning and might have to pull the captains chairs which makes more sense than trying to get these old bones contorted enough to do the job. The new carpet is heavier which is nice to walk on but could be a problem getting it to conform to the doghouse. But before getting there, I need to get the old stuff off. That’s where I’m at now. Just scrape like you did or see if there’s an easy solution. As usual I went straight to google. That’s where I found your old post again.
Seems not many have tackled this job. Most just put laminate floors down and leave the doghouse as is. But the carpet on our doghouse is in such bad shape, it has to go. We have two cats. And as they say, when the humans are away, the cats will play. To them, the doghouse is their scratching post. Need to keep that thought in mind as I look for that easy solution. So now I’m going to see if there’s a product that will dissolve the glue without asphyxiating me. Wish me luck.
Hope you are well and finding new secluded RVing spots.
GaryB1st