The topic of solar power on an RV comes up very regularly. Instead of repeating the same thing over and over, I thought perhaps documenting it might be helpful and consume less of my time. I am most certainly not the sole source of this information – this same information is all over the Internet and textbooks and has been around for a very, very long time.
Right off the bat, let’s get the air conditioning question out of the way. Running air conditioning from a 12 volt battery bank and solar is not reasonable at this point in time. Yes, it can be done but it will cost a good bit of money, require atypical equipment, and may require more solar panels that you have room for on your RV roof. If you have the roof space and the budget, go for it!
If interested in what I have installed, take a look at these posts:
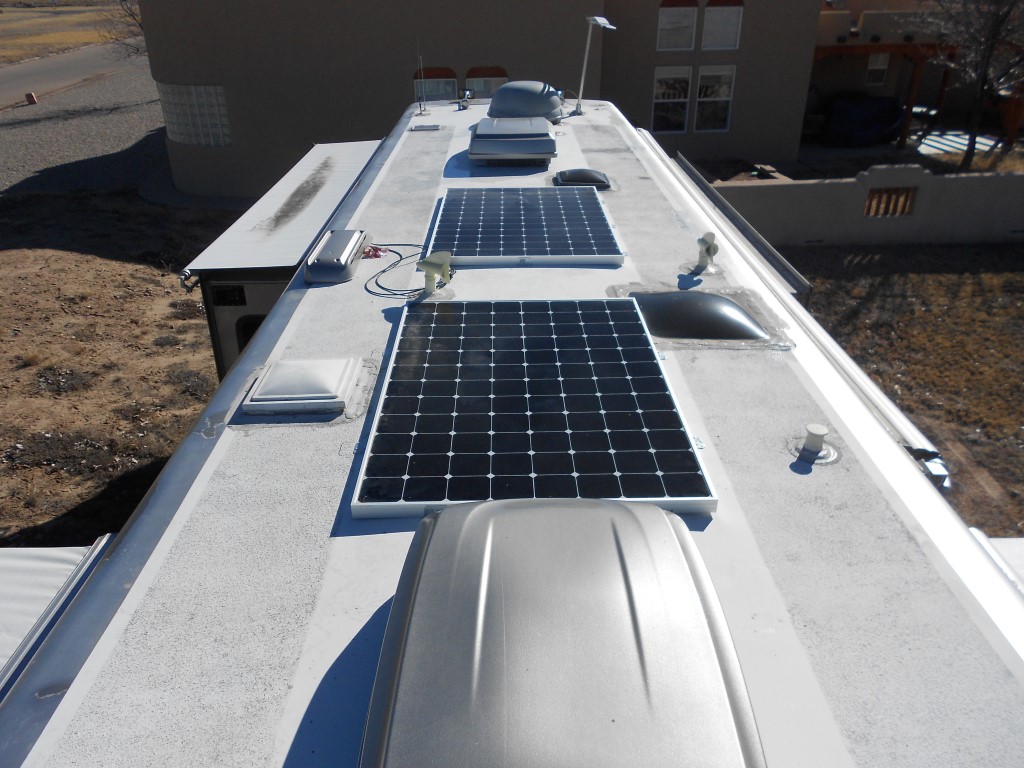
- 1720 Watt Solar System on Missy – my current home.
- Solar power on a cloudy day.
- Solar power system installed on my Newmar Dutch Star.
- Solar power success
- Solar power system installed on my Pace Arrow.
Some basics:
- Battery Bank: One or several batteries connected such that they make up one large storage “tank” for electricity/power. Typically this is a 12 volt DC storage tank and it is comprised of 6 volt DC and/or 12 volt DC batteries.
- Photovoltaic Panels/Solar Panels: The large, black panels that “absorb” energy from the sun (this is not accurate but it is descriptive). They are rated in watts and this represents the amount of power they would collect, per hour, under ideal circumstances. A reasonable rule of thumb is to expect 80% efficiency. They come in two general varieties (that you need to know about) – 12 volt and higher than 12 volt (referred to as “high voltage”, “grid tie”, “residential”, etc…).
- Charge Controller: The electronic “box” that converts the electricity generated by the solar panels into the electricity needed to charge the battery bank.
- Watt: A standard unit of power ( https://en.wikipedia.org/wiki/Watt).
- Amp or Ampere: A standard unit of electric current. https://en.wikipedia.org/wiki/Ampere
- Volt: A standard unit of electric potential. https://en.wikipedia.org/wiki/Volt
- AC: Alternating Current – the type of power typically in a sticks and bricks house.
- DC: Direct Current – the type of power typically found in your car.
Don’t over-think amps, volts, and watts. Take a look at this page on helcohi.com. From that site, this most excellent description:
“Electricity is measured in terms of amperage, voltage, and wattage. Amperage (amps for short) is a measure of the AMOUNT of electricity used. Voltage (volts) measures the pressure, or FORCE, of electricity. The amps multiplied by the volts gives you the wattage (watts), a measure of the WORK that electricity does per second.
Think of it this way: Electricity flowing through a wire is like water flowing through a garden hose. The amount of water that can fit through the hose depends on the diameter of the hose (amps). The pressure of the water depends on how far open the faucet is (volts). The amount of work that can be done (watts) depends on both the amount and the pressure of the water (volts x amps = watts).”
Assumptions:
I am focused here on a typical RV/Motorhome electrical system. These usually have a 12 volt DC system (battery bank) and a 110 volt AC system. This discussion is most appropriate for dry campers. People that like to be connected to a power grid at a campsite really don’t need to concern themselves with this discussion. As with everything, there are many variations and options. I am attempting to stick with the typical here. I am not including air conditioning in any of this discussion.
Another note: I absolutely hate listening to gas/diesel generators. I spend most of my time in very remote and isolated areas and I enjoy the quiet and sounds of nature. Listening to a generator for hours every day is very, very annoying to me. Thus; I do all I can to promote solar power. It is not the perfect solution for every situation but it is pretty good, pretty affordable and, best of all, SILENT.
The whole RV electrical discussion can be aided by thinking of the battery bank as a storage tank for electricity. All electrical components either draw from that tank or fills that tank.
The question most often asked is:
“What kind of solar system do I need?”
The best answer:
“One that supplies your needs.”
Simple. Right?
The only way to give a reasonably good answer is to start asking questions.
The first question:
What would you like to accomplish?
Do you want to satisfy all of your power needs with solar or just keep the battery bank topped off?
I’m going to assume you want a solar solution that fills all of you power needs since that is the typical answer.
Next question:
What are your constraints?
Panel mounting area on your roof, budget, or something else? If your budget is very limited but you really want some solar power, it is likely that your only option to intelligently purchase as much as you can afford and be happy with what it provides. For example; you may be able to purchase 100-200 watts of solar “equipment” for a couple hundred dollars. That may not supply all your power needs but it may allow you to run your generator far less each day.
Next question:
How much power do you need each day?
I am using the word “need” very broadly to mean the power required for all the things you typically do each day. The only way to know this is for you to do an energy audit (or energy budget, if you like). There is nothing hard about this task so do not let it scare you. Upon completion, you will better informed about your RV and its systems. Read this post (http://jdfinley.com/energy-audit-watt/) in which I describe how this is done.
Once the energy audit is done, you know how much power you need on a typical day. Obviously, there a high’s and low’s – some days you may need the furnace more than typical, some days you may watch a lot of TV and other days none. We are looking for a good average.
I now ask:
In what part of the country do you spend the majority of your time?
This map from the US National Renewable Energy Laboratory (http://www.nrel.gov/gis/solar.html) provides some information about how much solar energy can be expected in a particular area of the country. If typically in a high resource potential area, you can get by with less solar. If typically in a low resource potential area, you may need to “over build” your system to generated the needed power. NREL has some fantastic resources on their site – be sure to take a look around.
Additionally, a solar insolation map can be useful – like this one. From it, you can derive the average number of “full sun hours” per day for an geographic area. In my very limited experience, these maps are very conservative but still useful.
Alright, the hard work is done. You know you would like to put 2000 watt-hours of power in your storage tank each day (a nice round number picked for the sake of discussion). You spend most of your time in an area that has 4.5 full sun hours per day. That means, you need to size your solar array to gather approximately 450 watts per hour (2000 watts divided by 4.5 hours). Using our 80% efficiency rule of thumb, this means that 550 watts of solar panels are needed (450 watts divided by .8).
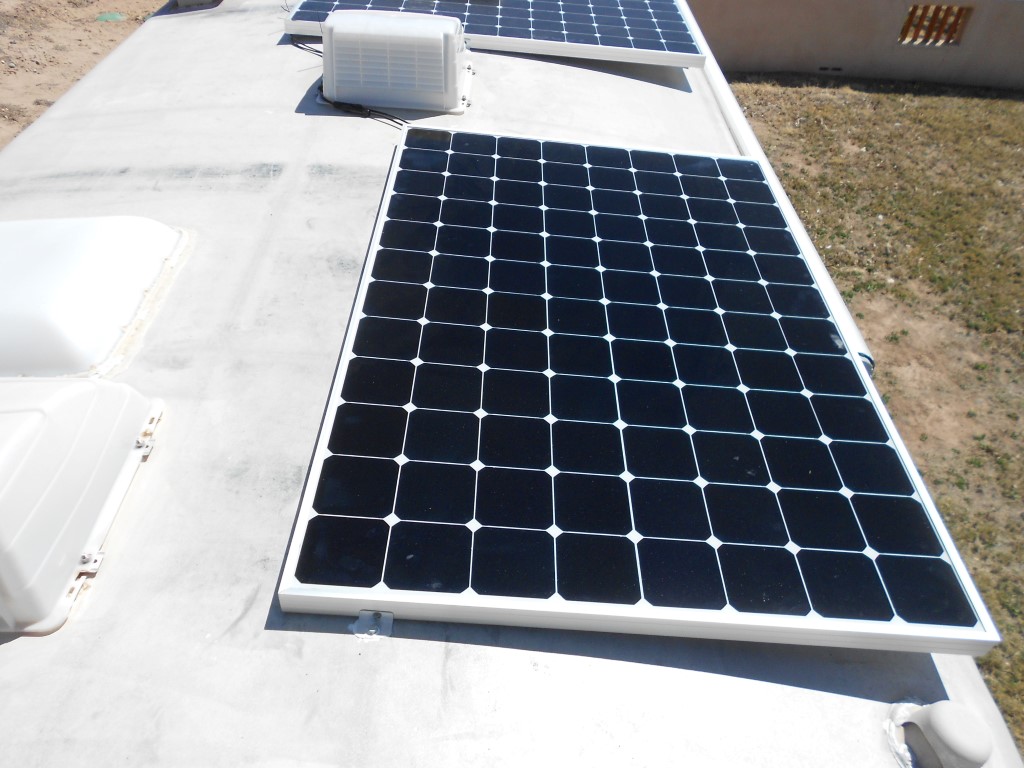
For this type of power, using 12 volts panels is not very efficient. There are other issues but for the sake of simplicity, we’ll leave it at that. The high voltage panels work VERY well, seem to produce power with less light (dawn, dusk, and cloudy) and are very “condensed” (lots of power for the square footage of the panel). Since we typically have limited space on the roof, condensed is good. However; these panels are typically fairly large physically – like 4′ x 5′ (approximately – they vary). Some RV roofs simply do not have this kind of available space.
Next, the charge controller. There are several variations but generally, for high voltage panels, PWM and MPPT are your options. MPPT is the best and the most expensive – but worth the cost. The size of the charge controller is dictated by the total power coming from the panels. In our case, 550 watts is approximately 40 amps at 13.5 volts (battery bank charging voltage). Thus, we will need a charge controller rated for at least 40 amps. Be aware though, that we are expecting 80% of the rated power from the panels and charge controllers can reportedly be over powered to a small extent without damage (I’ve heard 120% but have no proof of that). A quality 45 amp MPPT charge controller is going to cost something near $375. If you have any thought to adding solar panels in the future (to enhance your system), upsizing your charge controller now is one way to save money as the difference between a 45 amp and 60 amp MPPT charge controller is about $100.
Ok, we are rolling now! We have our solar panels and charge controller.
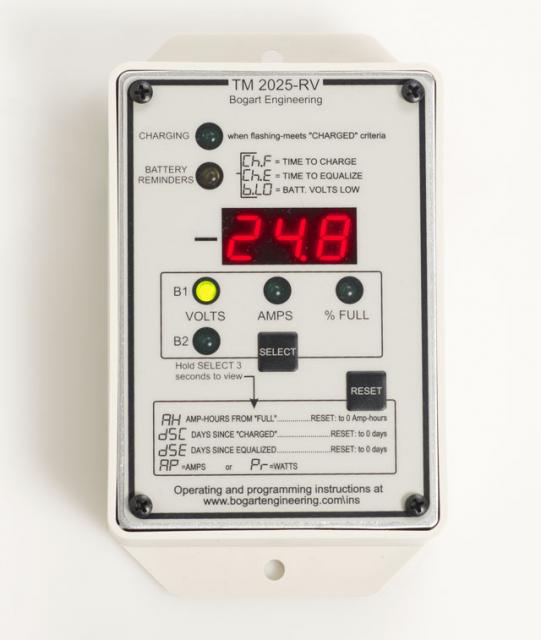
The next big ticket item is a good quality battery monitor. I have had excellent success with the Trimetric RV-2030 but I know there are several other quality units available. These are not a “voltage monitor” as this doesn’t tell you much – especially when there is a load on the battery. A good monitor uses a shunt to detect all the electrons going into the battery and coming out – it keeps track of all this and reports the information in meaningful ways. It is the worth the couple of hundred dollars. Typically, they come with the required shunt and cable. The shunt must be mounted near the battery bank and the cable ran to wherever you mount the monitor (hopefully in an easily accessible place inside the RV).
Now all you need to do is purchase the equipment (including cables, connectors, mounting brackets, bolts), route the cables/wires, mount the panels, and hook things up – and that is the fun part!!
Some random tips that may help:
- High voltage solar panels typically come with a short length of cable (positive and negative) having MC4 connectors. You do not need crimping equipment for these connectors (keep reading).
- The panels in the array may be joined using the MC4 combiner connectors. These come in a variety of forms such as two-into-one and three-into-one.
- A trick for ordering array cables is to order one cable slightly more than twice the length needed. Cut it in half and you then have the correct male and female connectors to attach to the array. Amazon and eBay are good sources.
- The MC4 cables are oriented to avoid connecting them backwards (positive to negative or vice-versa).
- The gauge of the MC4 cables depend on how much power you are going to run. Remember that the voltage in these cables is quite high so massive size is not required.
- Installing a large ANL fuse in the positive cable between the solar array and charge controller is mandatory. Amazon and eBay are good sources.
- Installing a large ANL fuse in the positive cable between the charge controller and battery bank is mandatory.
- Often the easiest way to run the solar array cables into the RV and to the charge controller is down the refrigerator vent stack. This is perfectly acceptable if you avoid the hot parts and secure the cables against vibration.
- There are dozens of ways to mount the solar panels to the roof of an RV. Sometimes it depends on the type of roof. Often you must purchase and manufacturer mounting feet. Sometimes called Z brackets (when in the shape of a Z). Sometimes an L bracket is sufficient. You can bolt into the roof of most RV’s but be aware that there is often pretty limited structure. Sealing any holes is critically important – something like ???? Is required. I glued my panels using a large L bracket and 3M 5200 adhesive.
- The panels should be mounted with an air gap. This is to allow airflow for cooling. It does not need to be huge – a couple of inches is enough.
- The panels do not need to be mounted with a complex tilting mechanism. Keeping the panels perpendicular to the sun will provide the greatest efficiency, unquestionably. However; a tilting mount adds a tremendous amount of complexity, cost, and weight. After all that, are you going to go out and adjust the tilt of the panels every 30 minutes or so, every day? Flat mounted panels are somewhat less efficient but that is included in our 80% factor above.
- No action is required when the battery bank is full. The charge controller is aware of this and effectively “shuts off” the power flow.
- A good charge controller includes a battery voltage sense line. This is two very small wires run from the battery bank positive and negative posts to two posts on the charge controller. This sense line allows the charge controller to see the actual state of the battery without any loads running thru the cable to skew the information. This line can be made from any 20, 22, or 24 gauge wire or even a telephone line cable (using only two of the wires).
- You will need to several ring terminals to connect the cables to the ANL fuse holders, battery terminals, and such. If your system were super simple, you would need at least five (sized to fit your ANL fuse holder and battery or shunt posts). However; some charge controllers have posts (ring terminal on cable required) some do not. So, you will have to study your equipment and lay it all out. Get quality ring terminals and borrow a good crimper. Poor electrical connections have ruined many a project.
- Fishing wires thru your RV is possibly the greatest challenge to this entire project. Every RV is different. I have found an electrical snake to be super helpful (this is a heavy gauge wire that electricians use to push thru a chase/channel, attach the wire that needs run, and then pull the wire back thru the chase).
- If you can, get a name brand charge controller. There are several good ones – MorningStar, Outback, Xantrex, etc… No name or cheap units from overseas seam to have issues and/or are failure prone.
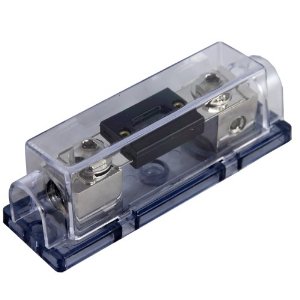
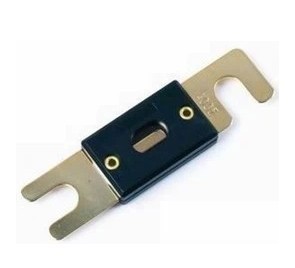
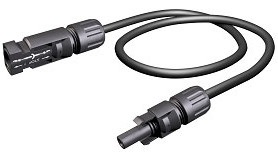
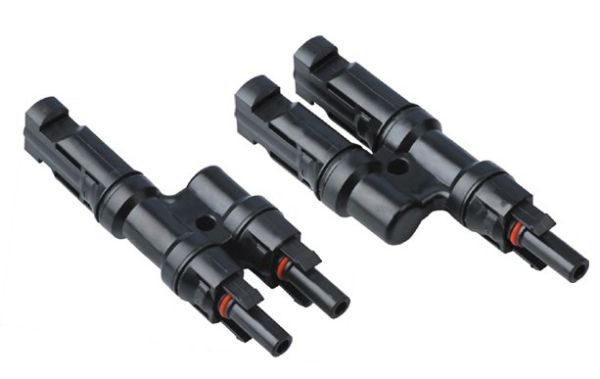
Some pictures that I hope will help identify some of the things mentioned above.
This is an ANL Fuse Holder
This is an ANL Fuse
This is a typical cable used between the solar panel array and the charge controller. It has MC4 connectors on each end. Note that one is male, the other is female.
This is an MC4 two-into one connector


Great post about your solar system it explains it very well. We are in the middle of finding class A DP and are also interested in boondocking. Your post describes a lot of questions I had about solar, as part of the things I’m interested in. There is so much information to know before you can even comprehend what is all needed to get your mobile home going as a self supported unit, amazing!
I’m gathering all I can find on my website so I know where to go and find it again. I enjoy your writing style and stories.
Happy travels!
Greetings from Woodbury MN
I sent you an email earlier regarding your solar project. I have another question: With your system, how many amp hours do each battery put out ? How many batteries do you have in your batt. bank? What is the total amp hour for your system? What’s your take on a complete solar kit for an RV? I was looking at a GO Power extreme ($3,700.00) Would it make make financial sense to buy each component separably.
Rob, my Dutch Star has four 6 volt batteries (for the house). Each battery is 220 amp-hours and, once connected in series/parallel, I have 440 amp-hours at 12 volts.
I have only installed two solar systems (on my own RV’s), I really like the “technical” as well as hands-on aspect of these projects, and I am a scrounger/fabricator. That said, I don’t find the solar kits to be a very good deal for someone like me. However; for someone wishing to skip much of the learning curve (e.g. what components work together) a kit may be the way to go, even with the higher cost. There are so many factors that come into play with an RV solar system that finding a kit that “fits” might be a challenge. I absolutely LOVE my huge, 96 cell, high voltage panels. However; many people simply do not have enough room on their roof for them. Some of these folks must go with the small 12V panels just to fit them into the available space. So, there is always some compromise. What I do know with certainty is that solar power is fantastic!!