I know… another Tailwheel Tale…. What can I say – the first one was so much fun I just had to do it again.
Once again, this tale is about more than just a wheel replacement on the tail my RV-4. Typically the spring would change to which the new full-swiveling wheel fork is mounted… and finally the actual wheel.
Why??
Several of reasons.
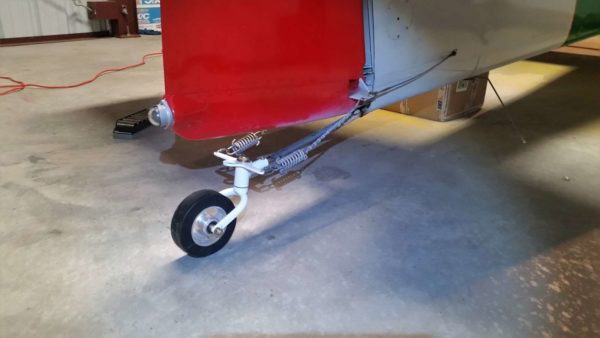
First, the existing/original wheel fork, and spring that bends 90 degrees at the end, provides nearly no ground clearance and it often hits rough terrain. Rough terrain includes cracks in pavement, pot holes, gravel, and semi-rough back-country airstrips. The new wheel fork is taller which pushes the tail of the airplane up a couple of inches which pushes the nose down and provides for better visibility on the ground. This also provides a bit more ground clearance that helps protect things – at least a tiny bit.
Second, the existing tail wheel mount is not “full-swiveling”. Huh?? Sounds strange, I know. A full-swiveling tailwheel is normally “connected” to the rudder cables so when you step on the right rudder pedal, the wheel is “turned” so the aircraft turns to the right and vice-versa. This is the desired mode, most of the time. However; with a bit of a tug – pressure from the side – the tail wheel mount disengages and the wheel is free to swivel all the way around. This is SUPER helpful when maneuvering in tight spaces (ability to spin in a circle without moving forward), pushing the airplane backwards into the hangar, or generally just moving it by hand.
If you read the first Tailwheel Tale about my RV-3, you know that it was a nightmare. In fact, several days’ worth of nightmare. Getting the original spring out of the weldments inside the fuselage was super difficult and required a friend to come up with a ‘tool’ to pull the spring out without damaging the fuselage.
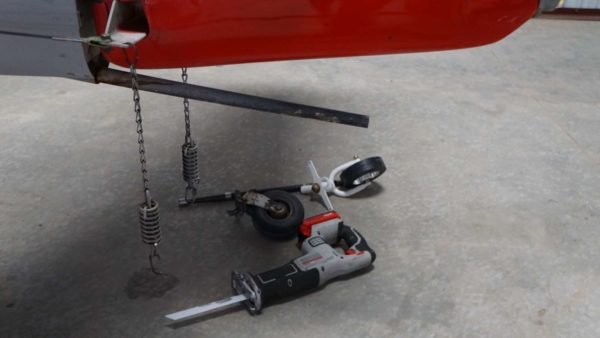
With a new Doug Bell tailwheel mount, a Dayton Murdock lightweight 6″ wheel, and a new machined tail spring in hand – all from FlyBoyAccessories.com, I went to work on the RV-4.
This should be a VERY easy project. Remove a bolt, disconnect the two rudder/tail wheel cables/springs, and the old equipment falls out on the floor. Reverse to install the new.
The trickiest part of the project SHOULD be drilling a hole in the new tail spring to match the existing hole in the aircraft for the bolt that holds the spring it in place.
The first BIG breath holding moment was after removing the tail spring retaining bolt. Would the old tail spring just fall out or would it be a major undertaking to extract like the RV-3??!?!?!
Drum roll!!
FAIL!!
The spring would not budge – not even the slightest hint of movement.
So, I re-installed the bolt and did nothing more.
I like doing nothing.
That was a couple of months ago. This past weekend, I was better prepared and ready to make attempt #2.
This time I had decided to try leaving the existing spring in place and “modify” it to work with the new fork assembly.
The first step was cutting the existing spring was easy.
“Machining” the spring was more work. I went VERY slowly with a handheld grinder – measuring frequently – and spent a bunch of time with a file.
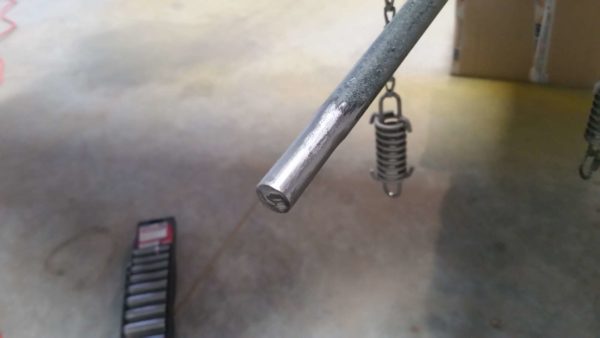
Hand machining a round steel rod is impossible. However; I was very happy with the results. The new tail fork fit on the spring very snugly – almost too tight to get it on and off.
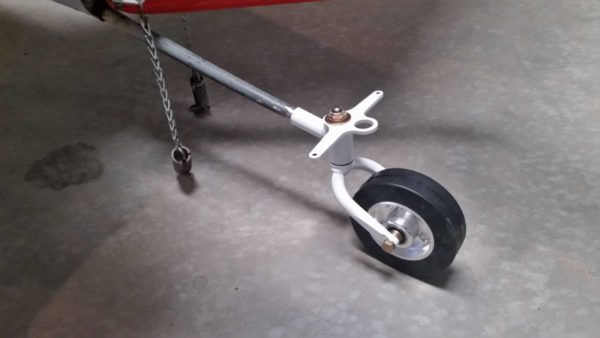
Drilling a hole for a bolt to secure the fork to the spring was next.
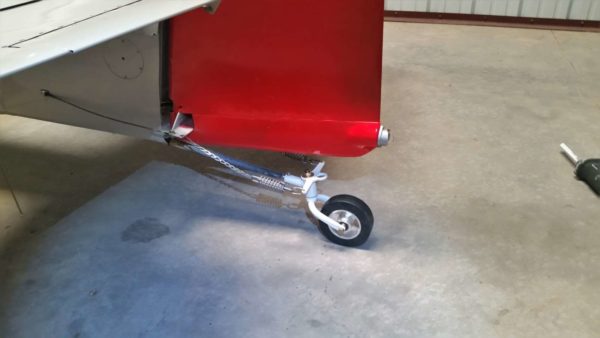
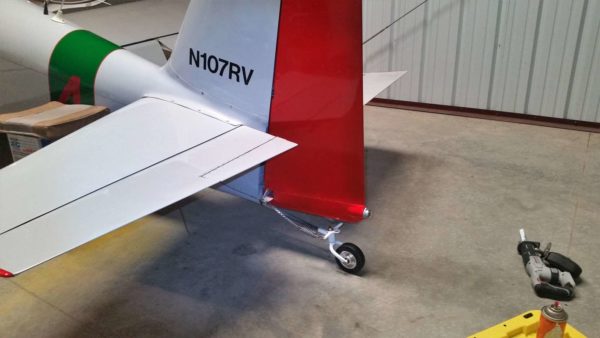
Finally, reconnect the cables and it was done!
Note from JD: I noticed a day or two later that a second bolt was called out in the instructions. I dutifully, did what I was told. 🙂

Huh??? just kidding!
Ok, I suppose I should start adding a summary sentence at the top of these posts. Something like “I worked on my airplane.” Then most of you can stop reading at that point. 🙂
That was a big job, well done. Keep flying.
Wow! Good job.