Note from JD: This is the last installment of this little project. Part 1 is here, part 2 here, and part 3 is here.
The base plate was bolted into place, the electrical towing harness ran from the front of the Jeep to the back lights, the Ready Brake cable connected to the brake pedal and ran to the base plate – it was time for the big test!
I pulled the motorhome around to the front of the house on a level area and pulled the Jeep up behind her. The first observation was that removing the receiver pin from the tow bar (to mount it to the receiver on the motorhome) was REALLY tight – I mean REALLY tight. Getting it removed and then back into place once the tow bar was in the receiver on the motorhome took way more effort that I expected. I suppose that is good as it means there is very little slop.
Ok, once all the pins were in place, I took her for a drive around the block. I chose to skip the Ready Brake for the first test. The Jeep tracked just as she is supposed to and the motorhome didn’t even seem to notice that the Jeep was back there.
So, I connected the Ready Brake. The directions for adjusting the cable is very simple, I followed them and drove a couple blocks. I’m not sure if things stretch or I didn’t have the cable clamps tight enough or what but when I stopped, my adjustment was way out. So, I re-adjusted. I repeated this one more time and then hit the highway (not Interstate). After a couple miles, I pulled over to check things out. Everything seemed fine. A couple more miles and a couple of stops, I checked again. This time it was obvious that I still did not have the Ready Brake cable adjusted tight enough. So, I re-adjusted, again. A couple more stops showed that the brakes on the vehicle were now working (front rotors were slightly warm to the touch). I decided this was good enough for now and called the test a success!!
All three of us (motorhome, Jeep, and I) all arrived back at home at the same time and without any obvious damage! Yay!
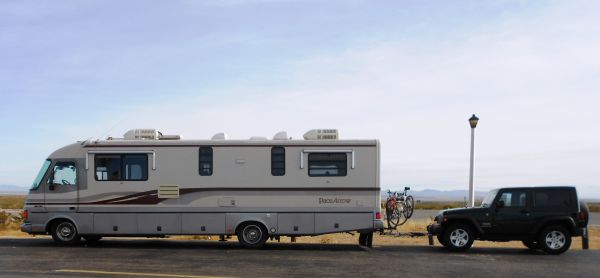 It seems that all tow bar manufacturers recommend (insist?) that the tow bar be level. Meaning, the hitch and the base plate mounting points must be at the same height. Of course, mine are not. The solution is a drop receiver. This actually worked out very nicely for me as I have a hitch mounted bike rack on which I typically carry my bikes. Using a dual receiver adapter like pictured below fixed the level issue with the tow bar AND allowed the bike rack to be used, as you can see from the above photo. Win-Win!!
NOTE from JD: It took several uses to finally notice that the above does not work with the Ready Brake tow bar. There is not enough room to allow the tow bar’s brake lever to move. I no longer use this setup and instead put my (now more expensive) bikes inside the Jeep.
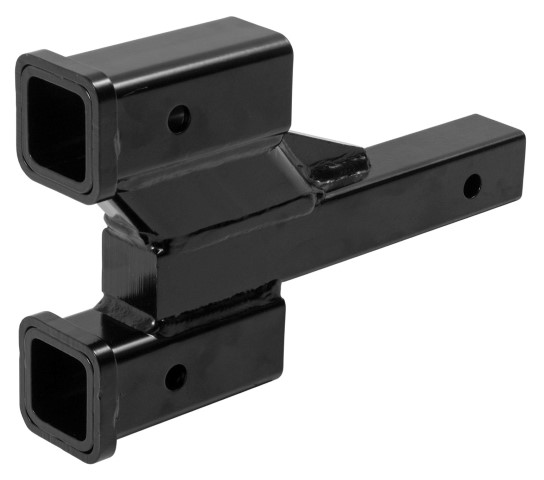

It looks like the ready break arm would hit the bottom of your bike rack when fully extended. How much clearance is there between the two receivers?
Arg – misspelled Ready Brake. Anyway, here is a video that shows how far the bar extends upward when actuated: https://www.youtube.com/watch?v=G6sEJsrCh28. It looks like you would need more than 4″ of clearance between the two receivers.
Hi Will – you are exactly right! I finally noticed that after using the setup three or four times. About that same time, I upgraded my bikes and no longer wanted to carry them on an outside rack so quick using it. I’ll go back and add a note about this.