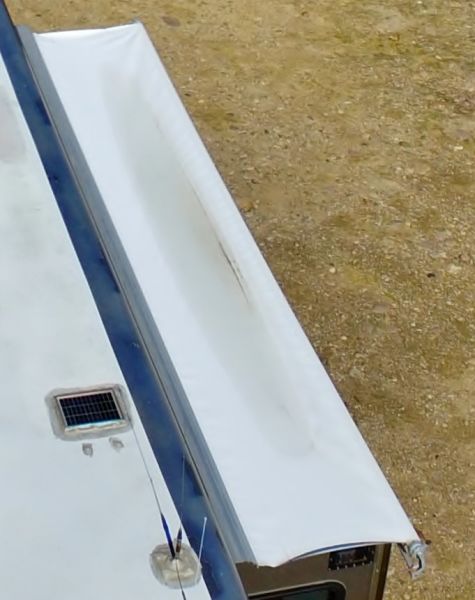
Many RV’s have little awning over slideouts to keep debris and water off the slideout. These little awnings are called a “topper”. A topper automatically deploys when the slideout is extended. I have three of these toppers with one slideout being covered by the main patio awning.
The topper fabric on my driver side living room slideout was old and stretched. When it rained, it allowed water to pool. This isn’t the end of the world except I routinely forget to close the windows when I bring the slides in so half the water
I researched the various places that seller topper replacements. The one that I finally selected was Tough Top Awnings. I really like the option of the heavier 18 ounce fabric that they offered. Of course, an easy to use website is always VERY popular with me!
Following their instructions, I ordered a coated vinyl RV slideout replacement fabric of 162″ wide and 32.5″ deep.
The big box showed up in pretty short order (first week of June) and the replacement topper looked great. The fabric was trimmed to the correct dimensions, had plastic “piping” installed (where it is slipped into the mounting “slots”), and all the sewing/seams looked very nice.
Then it sat there. And sat there… and sat there…
Recently, I was sitting in a spot where the wind blowed 40 mph for a couple of days. This caused my topper fabric to really take a beating – at least it did before I decided to pull the slides in to avoid damage.
So, finally, late November, I organized a small group of friends to help me make the change.
The old fabric was removed by rolling the “roller” all the way “out” and pinning it in that position. I then removed the one screw in the track that prevents the fabric from slipping out. Then, it was an easy task to slip the fabric out and off.
Easy part done!
Installing the new fabric was a wee bit more work. I had one friend standing on the slideout, one friend on a ladder guiding the fabric into the slot on the roller, and me laying on the roof and guiding the fabric into the slot in the awning cover. The friend on the slideout carefully pulled the fabric, a few inches at a time, each side at a time, down the track. This probably took all of ten minutes but we were careful to avoid tearing the fabric as it slid into the two mounting “slots”.
The plastic “piping” type material that is in the replacement fabric and retains it in the mounting “slots” is trimmed to fit in the awning cover “slot” and the screw in “plug” is screwed back into place.
That’s it – the topper is as good as new. Very easy little project.
I suspect this project could be done by one person but it would be a LOT of work. Having a couple extra sets of hands makes it a quick and easy project.
Now I have to wait for it to rain to know if I solved my puddle problem!


Leave a Reply