Lots of thought and effort (thought is effort, isn’t it???) has been going into Missy’s ceiling lately.
I continue to be impressed with RV/motorhome designers!! The number of things that they are responsible for is impressive. Including the design, making it all work with very limited space, and getting the build order correct so everything goes together smoothly!!
Missy has two halves – the front half and the back half. The front being the living room & kitchen. The back being the bathroom, bedroom, and closet. I’m currently focused on the ceiling in the front half. As I mentioned back here, I really want ducted air conditioning and that creates a few complexities in the back half so I’m doing my best to ignore that for now.
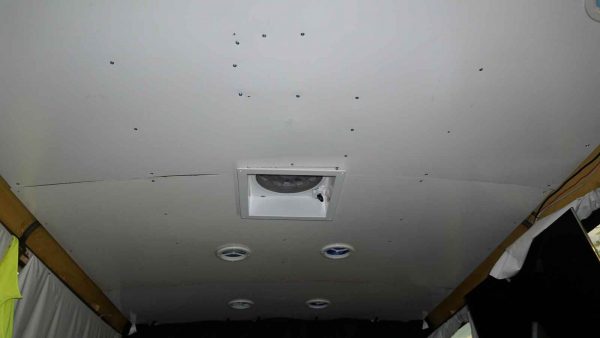
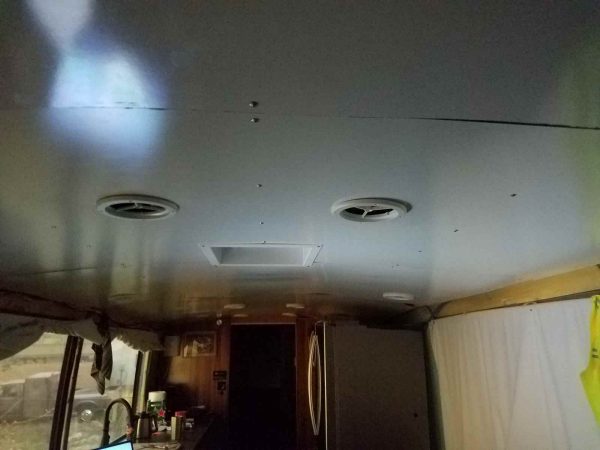
Here I tested a ceiling panel option. That option has kind of grown on me and I decided to go ahead with it. It is just cheap, dry erase board but it looks reasonably nice. The light color makes the ceiling seem taller and adds space – at least it feels that way to me.
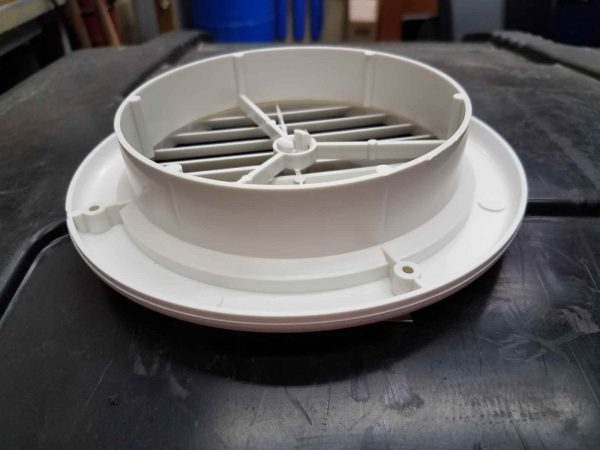
Finding a ceiling vent that would fit my ‘thin’ ceiling panel and duct was not easy. I searched everywhere and eventually found these.
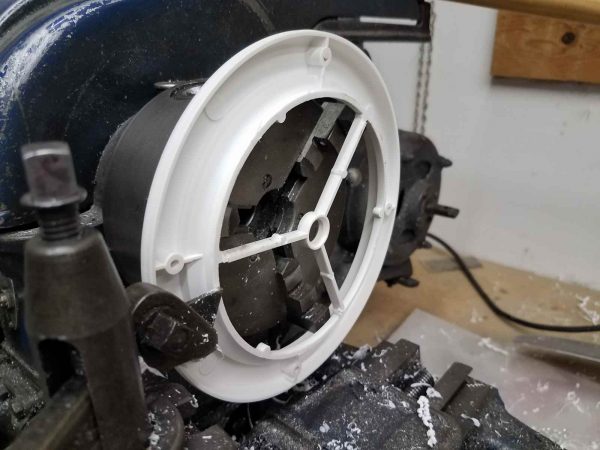
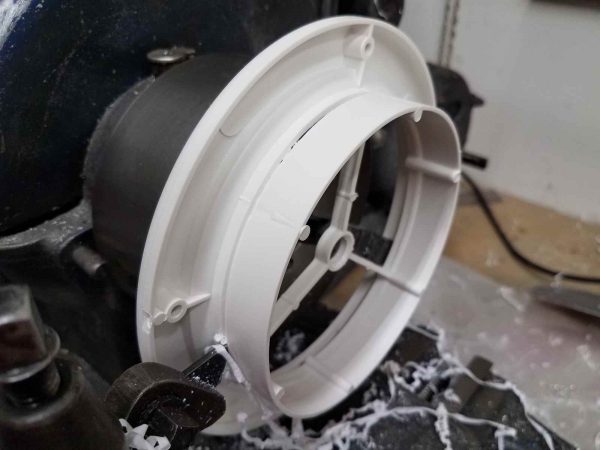
They are much too tall (or thick) but most of the height is just unused plastic. So, perhaps with some modification they would work. I ordered a mess of them and then each one spent a bit of time on the lathe.
The result is a thin ceiling vent that works fairly well. I would have rather had a flush style vent. Maybe even one that allowed some control over the airflow. However; one can’t be too picky!
Since I am financier, owner, builder, laborer, & and all around grunt… holding the ceiling panels in place while attaching them was a bit of work. Especially with one arm that doesn’t work as well as I’d like. Regardless, they eventually went into place.
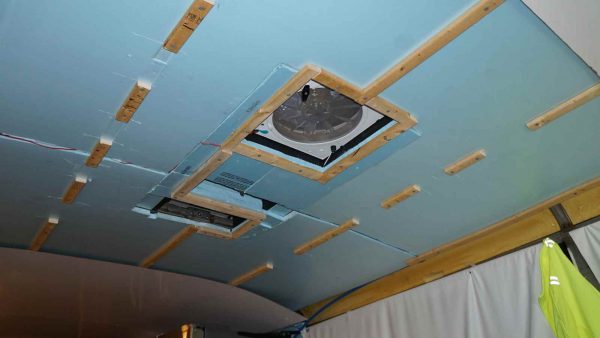
The trickiest bit was establishing the in and out air supplies to the air conditioner. This photo is an early iteration. In this photo, the Fantastik Air Vent is forward of the air return duct followed by the cold air ‘output’. There is a bit more to it as a couple of airflow directors/diverters ended up being required.
This front most panel was the trickiest as it has to semi-match the curved edges of the molded ceiling that is over the cockpit/driver area. I measured, marked, cut, and then did the ‘hold it in place, see what doesn’t fit, take it down, trim a little bit, & repeat’ routine until the fit was reasonable.
I found some of this white trim strip on Amazon and I plan to use it on this front panel. So, a perfect fit isn’t required.
Keeping quiet…
The ceiling is certainly not “done” but the difference in sound level is very noticeable. Previously (without the ceiling panels), hearing the television with the front air conditioning running was not easy and required the volume to be very high. With the panels, I can still hear without having to change the volume (though a slight increase does help). I took a couple crude measurements. Sitting at my favorite spot on the left side of the couch, the noise level is 30.8 db without the A/C. With the A/C running (low fan) and NO ceiling or air ducts, the noise level is 65 db. With the new ceiling and are ducts and A/C running as before, the noise level is 50.4 db.
Staying cool…
Daytime highs over the last couple weeks have been in the mid 90’s and the A/C is keeping the bus cool so I think the ducting is working ok.
Yes… as you might guess, I’ll be plugging away on the back half of Missy’s ceiling now…



Leave a Reply